The world of automotive diagnostics is no longer a mystery thanks to the advent of OBD2 scanners. But what if you could delve deeper and build your own “arduino obd2 code reader“? This guide will take you through the process, from understanding the basics to building a functional code reader.
Understanding OBD2 and Arduino
Before diving into the how-to, it’s essential to understand the key players:
- OBD2 (On-Board Diagnostics II): This standardized system allows external electronics to interface with a vehicle’s computer, retrieve diagnostic information, and even clear specific codes.
- Arduino: A versatile, open-source platform based on easy-to-use hardware and software. Its flexibility and affordability make it perfect for DIY projects, including our OBD2 code reader.
What You’ll Need for Your Arduino OBD2 Code Reader
To embark on this DIY journey, you will need:
- Arduino Board: The Arduino Uno is an excellent starting point due to its simplicity.
- ELM327 OBD2 to TTL Adapter: This acts as the bridge between your car’s OBD2 port and the Arduino, converting signals for communication.
- Jumper Wires: For connecting various components.
- LCD Display (Optional): To display the retrieved codes.
- Breadboard (Recommended): For easy prototyping and circuit building.
Wiring the Arduino OBD2 Code Reader
Connecting the components correctly is crucial:
-
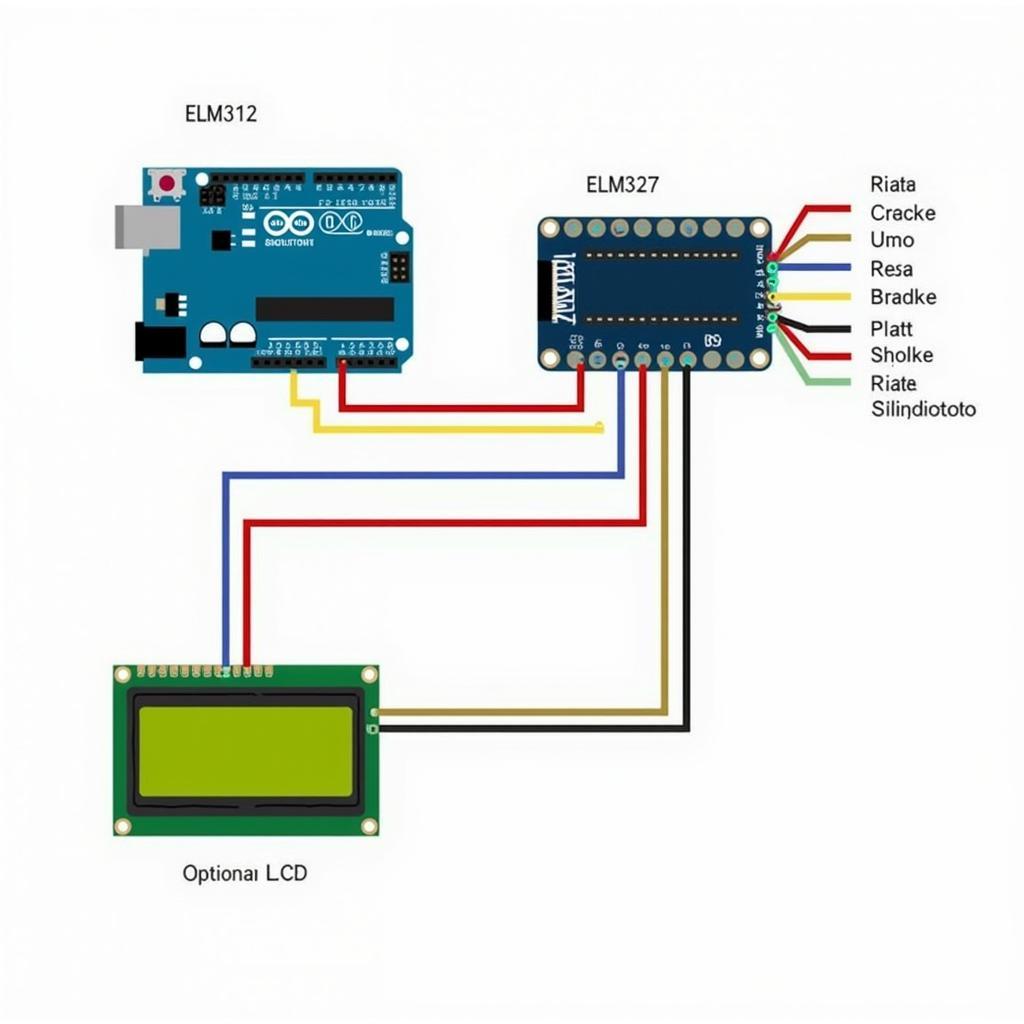
Connect the ELM327:
- VCC (ELM327) to 5V (Arduino)
- GND (ELM327) to GND (Arduino)
- TX (ELM327) to Digital Pin 10 (Arduino)
- RX (ELM327) to Digital Pin 11 (Arduino)
-
Connect the LCD (Optional):
- Follow the specific wiring instructions for your chosen LCD model.
Programming Your Arduino OBD2 Code Reader
Now comes the exciting part: bringing your code reader to life using the Arduino IDE.
-
Install the Necessary Libraries:
- You’ll need libraries to communicate with the ELM327 adapter and, if using one, your LCD display.
-
Write the Code:
- The code will initialize communication with the ELM327, send requests for OBD2 data (like diagnostic trouble codes), receive and decode the information, and finally, display it on the serial monitor or LCD.
-
Upload and Test:
- Upload the code to your Arduino board. Connect the ELM327 to your vehicle’s OBD2 port (usually located under the steering wheel).
Reading and Clearing Codes with Your Arduino OBD2 Reader
With your DIY code reader up and running, you can now:
-
Read Diagnostic Trouble Codes (DTCs):
- Your code will retrieve and display stored DTCs, providing insights into potential issues.
-
Clear Codes (Use with Caution):
- Your Arduino OBD2 code reader can also clear DTCs. However, only do so after properly diagnosing and addressing the underlying problem. Clearing codes without resolving the issue can mask problems and hinder proper repair.
Expanding Your Arduino OBD2 Code Reader
“The beauty of this project lies in its potential for customization,” says Dr. Emily Carter, automotive electronics engineer. “You can add features like real-time data logging, GPS tracking, or even integrate it with other systems for enhanced diagnostics.”
Consider these additions:
- Data Logging: Log data to an SD card for later analysis.
- GPS Integration: Combine location data with OBD2 readings.
- Smartphone Connectivity: Send data to your phone for real-time monitoring.
Conclusion
Building your own “arduino obd2 code reader” is a rewarding experience that combines hands-on electronics with the world of automotive technology. It’s a fantastic way to understand your vehicle better and potentially save on diagnostic costs. So, gather your components, unleash your inner maker, and embark on this exciting DIY journey!
FAQ
-
Can I use any Arduino board for this project? While the Arduino Uno is a great starting point, most Arduino boards will work. Just ensure the chosen board has enough digital pins for the connections.
-
Is it safe to clear codes with an Arduino OBD2 code reader? Clearing codes should only be done after identifying and fixing the underlying issue.
-
Where can I find more advanced Arduino code examples? Online forums and communities dedicated to Arduino and automotive electronics are great resources for finding code examples and inspiration.
-
Can I use this code reader on any car? The OBD2 standard is used in most cars manufactured after 1996. However, there might be some variations between makes and models.
-
Do I need coding experience for this project? Basic knowledge of the Arduino IDE and C++ programming is helpful. However, numerous online resources and tutorials can guide you through the process.
Don’t hesitate to contact our team for assistance. Reach us on WhatsApp: +1(641)206-8880, or Email: [email protected]. We offer 24/7 customer support!


