The J1962 OBD2 wiring standard might sound like a complicated technical term, but understanding it can be surprisingly straightforward. This guide breaks down everything you need to know about J1962 OBD2 wiring, from its purpose and evolution to practical tips for troubleshooting common issues.
The J1962 standard is essentially the language spoken between your vehicle’s onboard diagnostics system (OBD2) and the outside world, primarily your OBD2 scanner. This standardized communication protocol ensures that regardless of your vehicle’s make or model, any compatible OBD2 scanner can access vital diagnostic information. This data is crucial for identifying and potentially resolving issues with your car.
The History and Evolution of J1962 OBD2 Wiring
Before the J1962 standard, car manufacturers had their own unique diagnostic systems and connectors, making it a nightmare for mechanics to diagnose problems across different vehicle brands. Imagine needing a different connector and diagnostic tool for every car that rolled into the shop!
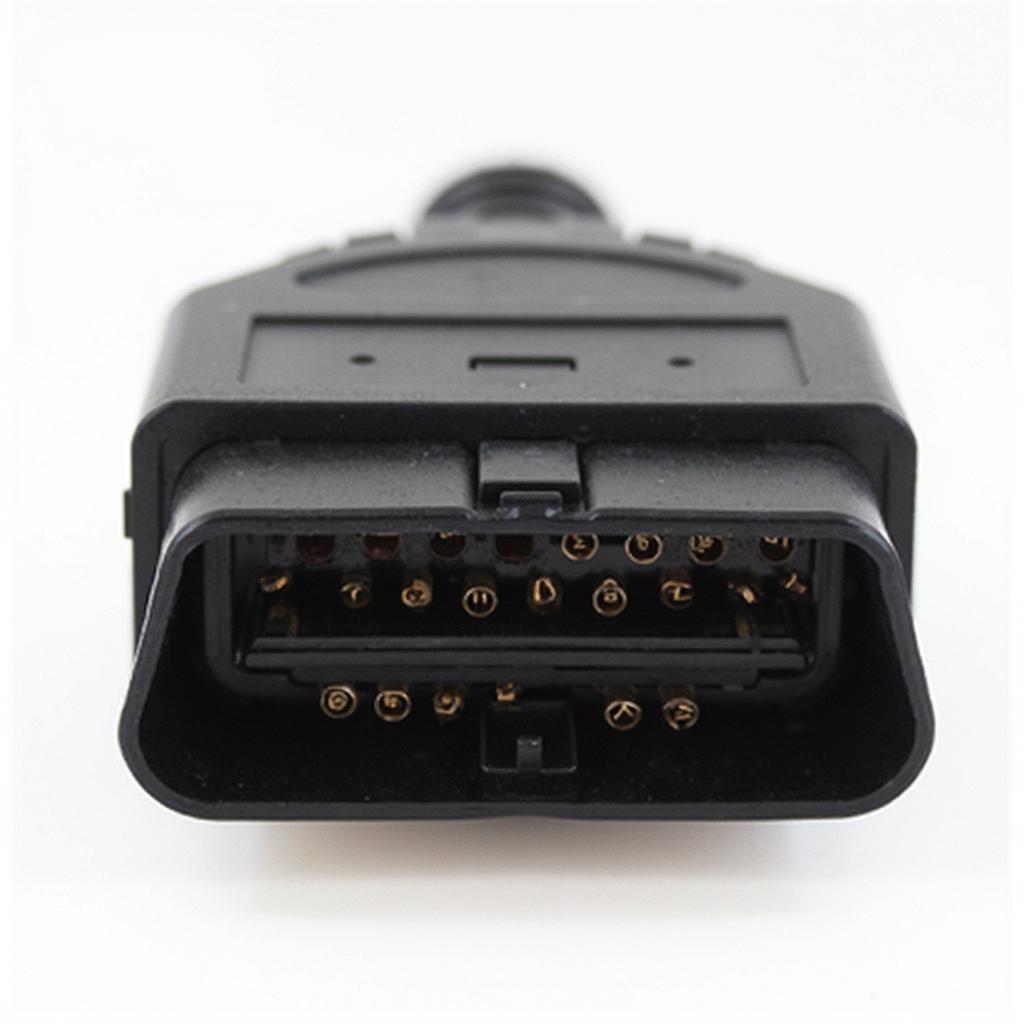
The J1962 standard, introduced in the mid-1990s, revolutionized car diagnostics. It standardized the OBD2 connector, a 16-pin trapezoidal port usually located under the driver’s side dashboard. More importantly, it unified the communication protocol, enabling universal OBD2 scanners to understand the data from any compliant vehicle.
Over time, the J1962 standard has undergone revisions to encompass advancements in automotive technology. These updates ensure it remains relevant and effective in retrieving diagnostic information from modern vehicles with increasingly complex systems.
Understanding the J1962 OBD2 Connector
The 16 pins on the OBD2 connector are not randomly assigned. Each pin has a specific function, transmitting data related to various vehicle systems. Here’s a simplified breakdown:
- Pin 1: Manufacturer Discretionary
- Pin 2: J1962 Bus+ (SAE J1850)
- Pin 3: Manufacturer Discretionary
- Pin 4: Chassis Ground
- Pin 5: Signal Ground
- Pin 6: CAN High (J-2284)
- Pin 7: ISO 9141-2 K Line
- Pin 8: Manufacturer Discretionary
- Pin 9: Manufacturer Discretionary
- Pin 10: J1850 Bus-
- Pin 11: Manufacturer Discretionary
- Pin 12: Manufacturer Discretionary
- Pin 13: Manufacturer Discretionary
- Pin 14: CAN Low (J-2284)
- Pin 15: ISO 9141-2 L Line
- Pin 16: Battery Voltage
Don’t worry if some terms sound unfamiliar. What’s important to understand is that these pins relay information about your engine, transmission, emissions system, and more, to the OBD2 scanner.
Common Applications of the J1962 OBD2 Standard
The J1962 standard impacts various aspects of vehicle diagnostics and maintenance, making it indispensable for mechanics and car enthusiasts alike:
- Retrieving Diagnostic Trouble Codes (DTCs): When your check engine light illuminates, the OBD2 system stores a specific code indicating the potential issue. An OBD2 scanner, using the J1962 protocol, reads these codes, providing valuable clues for diagnosis.
- Monitoring Vehicle Performance Data: J1962 allows access to real-time data like engine RPM, coolant temperature, oxygen sensor readings, and more. This information helps identify developing problems and optimize vehicle performance.
- Conducting Emissions Tests: Many regions require periodic emissions tests. The OBD2 system, adhering to J1962, plays a crucial role in evaluating your vehicle’s emissions performance.
Troubleshooting J1962 OBD2 Wiring Issues
While the J1962 standard aims for universal compatibility, occasional wiring issues can arise. Here are some common problems and possible solutions:
- No Communication with OBD2 Scanner: If your scanner fails to connect, start by checking the OBD2 fuse. A blown fuse will interrupt communication. Additionally, inspect the connector for any bent or damaged pins.
- Intermittent Connection: Loose or corroded wiring within the connector can cause intermittent communication issues. In such cases, carefully cleaning the connector pins with electrical contact cleaner might resolve the problem.
- Incorrect Data Display: If the scanner displays illogical data or error messages, double-check that you’re using a scanner compatible with your vehicle’s make, model, and year. Software updates for the scanner might also be necessary to ensure accurate readings.
Expert Insights on J1962 OBD2 Wiring
“While the J1962 standard has significantly simplified car diagnostics, understanding its nuances can be invaluable,” says John Smith, a seasoned automotive engineer with over 20 years of experience. “Familiarizing yourself with the pin layout and common communication protocols can help troubleshoot connection problems and maximize the use of your OBD2 scanner.”
He further adds, “Remember, while DIY diagnostics can be helpful, always consult a qualified mechanic for complex issues or before attempting any repairs yourself. “
Conclusion: Embracing the Power of J1962 OBD2
The J1962 OBD2 wiring standard has been a game-changer for the automotive world. Understanding its fundamentals empowers car owners and mechanics alike to diagnose and address vehicle issues effectively.

