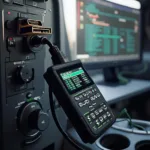
An OBD2 memory saver is a crucial tool for maintaining your vehicle’s electronic settings during a battery disconnect. Understanding how to use an OBD2 memory saver can prevent the loss of important data and ensure a smooth restart after battery replacement or other electrical work. Let’s dive into the details of using this handy device.
Many drivers find themselves frustrated by lost radio presets or other electronic settings after a battery change. An obd2 code saver can eliminate this frustration, preserving your vehicle’s memory and settings. This guide will walk you through the process, ensuring you’re prepared for your next battery replacement.
Why Use an OBD2 Memory Saver?
Modern vehicles rely heavily on computerized systems. These systems control everything from engine performance to comfort features like seat positions and radio presets. When the battery is disconnected, these systems lose power, and consequently, their stored memory. An OBD2 memory saver acts as a temporary power source, preventing data loss during this critical period.
Benefits of Using a Memory Saver
Using an OBD2 memory saver offers several key advantages:
- Retains Vehicle Settings: Preserves radio presets, seat positions, and other personalized settings.
- Avoids Diagnostic Trouble Codes (DTCs): Prevents the appearance of error codes that can sometimes occur after a battery disconnect.
- Saves Time and Effort: Eliminates the need to reprogram vehicle systems after battery replacement.
- Protects Sensitive Electronics: Safeguards the vehicle’s computer systems from potential damage due to power fluctuations.
How to Use an OBD2 Memory Saver: A Step-by-Step Guide
Using an OBD2 memory saver is a straightforward process. Follow these steps to ensure you’re using it correctly:
- Locate the OBD2 Port: The OBD2 port is typically located under the dashboard on the driver’s side.
- Connect the OBD2 Memory Saver: Plug the memory saver into the OBD2 port.
- Connect the Power Source: Connect the other end of the memory saver to a 12V power source, such as a jump starter pack or another vehicle’s battery (ensure the donor vehicle is off).
- Verify Power: Check the indicator light on the memory saver to confirm it’s receiving power.
- Disconnect the Vehicle Battery: Now you can safely disconnect your vehicle’s battery.
- Perform the Necessary Work: Replace the battery or perform other electrical work.
- Reconnect the Vehicle Battery: Once the work is complete, reconnect the vehicle’s battery.
- Disconnect the OBD2 Memory Saver: After the battery is reconnected, remove the memory saver from the OBD2 port.
This process might seem simple, and indeed it is, but correctly implementing these steps is vital. A snap on obd2 memory saver for instance, though a high-quality tool, will be ineffective if not properly connected.
Choosing the Right OBD2 Memory Saver
Not all OBD2 memory savers are created equal. When choosing a memory saver, consider the following factors:
- Quality and Durability: Opt for a reputable brand and a well-built device.
- Power Source: Choose a memory saver that’s compatible with your available power sources.
- Ease of Use: Look for a device with clear instructions and simple operation.
 Various Types of OBD2 Memory Savers
“Investing in a quality OBD2 memory saver is a small price to pay for the peace of mind it provides,” says seasoned automotive technician, Robert Hernandez. “It prevents headaches and saves valuable time in the long run.”
Common Questions about OBD2 Memory Savers
How long can I leave an OBD2 memory saver connected?
Most OBD2 memory savers can be left connected for several hours, ensuring your vehicle’s settings are preserved throughout the battery replacement process.
Do I need an OBD2 memory saver for every car battery replacement?
While not strictly mandatory, using an OBD2 memory saver is highly recommended for modern vehicles with complex electronic systems.
Can I use a household power outlet to power an OBD2 memory saver?
No, using a household power outlet is not recommended. Use a 12V DC power source like a jump starter or another vehicle’s battery with the engine off. You may also need to consider changing car battery obd2 power if you don’t have another vehicle available.
Conclusion
Knowing how to use an OBD2 memory saver is a valuable skill for any car owner. It’s a simple process that can save you time, money, and frustration. obd2 memory is crucial, so protecting it during battery changes is vital. By following the steps outlined in this guide, you can ensure your vehicle’s settings are preserved, and your car is ready to go after any electrical work.
FAQ
- What is the purpose of an OBD2 memory saver? (To preserve vehicle settings during battery disconnection.)
- Where is the OBD2 port located? (Usually under the dashboard on the driver’s side.)
- What type of power source do I need? (A 12V DC source, like a jump starter or another vehicle’s battery.)
- How long can I leave the memory saver connected? (Several hours.)
- Is a memory saver necessary for every battery change? (Highly recommended for modern vehicles.)
- Can I use a household outlet? (No, use a 12V DC source.)
- What happens if I don’t use a memory saver? (You may lose vehicle settings and possibly trigger DTCs.)
For further assistance, please don’t hesitate to reach out to our 24/7 support team via WhatsApp: +1(641)206-8880, or Email: [email protected]. We’re here to help!

