Performing a 1988 F150 OBD2 swap can seem daunting, but with the right information and preparation, it’s a manageable project that unlocks valuable diagnostic capabilities. This guide will walk you through the process, explaining the benefits, challenges, and steps involved in converting your 1988 Ford F150 to the OBD2 standard.
Why Consider a 1988 F150 OBD2 Swap?
The primary reason for a 1988 F150 OBD2 swap is enhanced diagnostics. Pre-OBD2 systems, like the one in your 1988 F150, offer limited diagnostic information. OBD2, on the other hand, provides a standardized system for accessing a wealth of data about your truck’s engine performance, emissions, and other vital systems. This allows for more accurate troubleshooting and easier repair, ultimately saving you time and money. Plus, modern OBD2 scanners offer advanced features such as live data streaming and freeze frame data, giving you a real-time look at your engine’s operation.
Challenges of a 1988 F150 OBD2 Swap
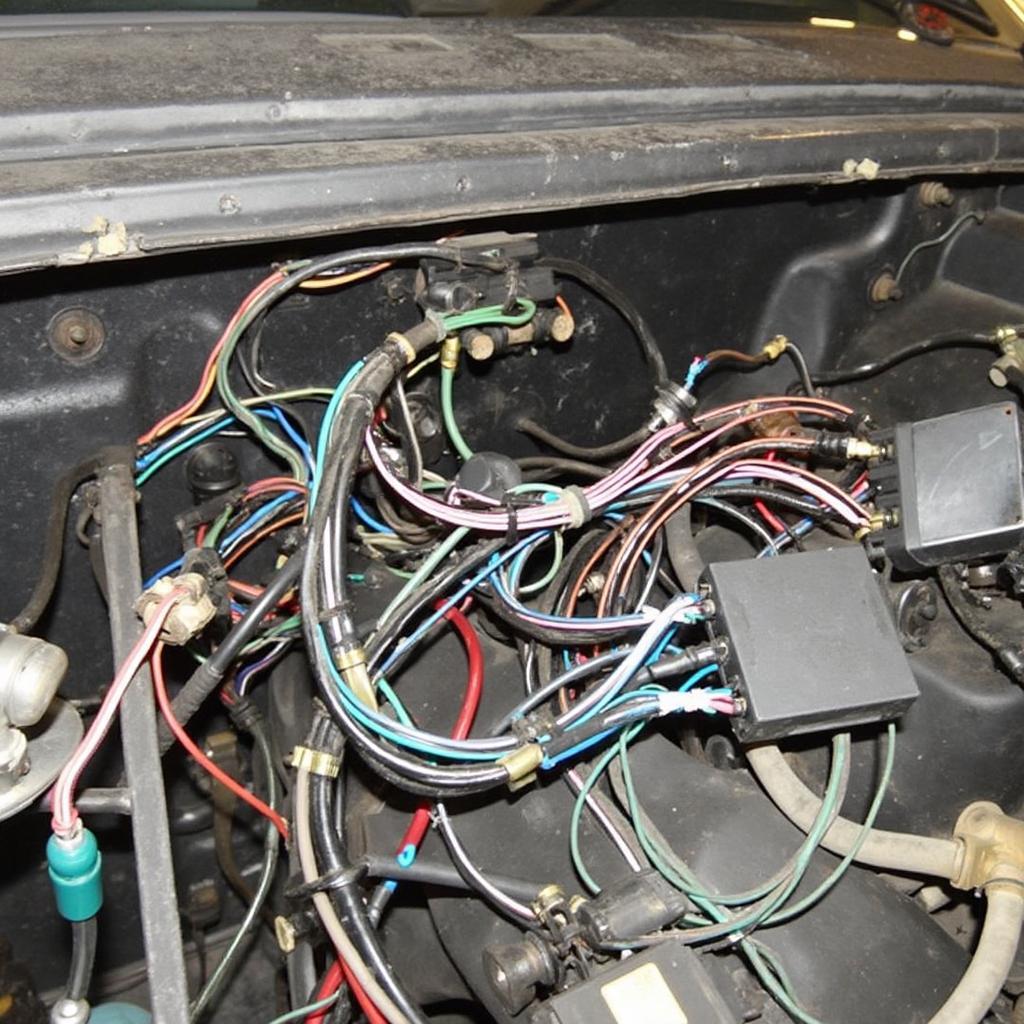
While the benefits are clear, it’s crucial to understand the challenges. This isn’t a simple plug-and-play modification. It involves significant wiring work, potentially requiring modifications to your truck’s existing harness. You’ll need a thorough understanding of your F150’s electrical system or the assistance of a qualified mechanic. Another challenge is sourcing the correct components, including the OBD2 computer (ECU), wiring harness, and sensors.
Gathering the Necessary Parts for your 1988 F150
A successful 1988 F150 obd2 swap hinges on having the right parts. You’ll need an OBD2-compliant ECU compatible with your F150’s engine. Research carefully to find the correct model. You’ll also need a matching wiring harness, oxygen sensors, and potentially other sensors depending on your engine configuration. Salvaging parts from a donor vehicle of a similar year and engine type can be a cost-effective option, but ensure compatibility.
Step-by-Step Guide to the 1988 F150 OBD2 Swap
- Disconnect the battery: Safety first! Always disconnect the negative battery terminal before working on any electrical system.
- Remove the old ECU: Locate and remove your truck’s existing ECU. This is usually located under the dash or in the engine compartment.
- Install the new ECU and wiring harness: Carefully install the new OBD2 ECU and its corresponding wiring harness. This involves connecting the harness to the various sensors and components throughout your truck.
- Connect the oxygen sensors: Install the new oxygen sensors in the exhaust system. These are critical for the OBD2 system to function correctly.
- Double-check all connections: Before reconnecting the battery, thoroughly inspect all connections to ensure they are secure and correct.
- Reconnect the battery and test: Reconnect the negative battery terminal and turn the ignition on. Use an OBD2 scanner to check for any fault codes and verify that the system is communicating correctly.
Is a 1988 F150 OBD2 Swap Worth It?
For those seeking enhanced diagnostics and the ability to use modern scan tools, the 1988 F150 OBD2 swap is a worthwhile investment. It allows for more precise troubleshooting and potentially easier repairs. However, consider the complexity and potential cost. If you’re not comfortable with automotive wiring, seeking professional help is highly recommended.
“A properly executed OBD2 conversion can significantly improve the diagnostic capabilities of older vehicles,” says Michael Garcia, ASE Certified Master Technician. “However, it’s essential to understand the process and ensure proper component selection and installation.”
Conclusion
The 1988 f150 obd2 swap can be a complex but rewarding undertaking. By understanding the process, gathering the right parts, and following the steps carefully, you can unlock the power of modern diagnostics for your classic truck. This upgrade empowers you with more control over your vehicle’s maintenance and repairs.
FAQ
- What are the primary benefits of an OBD2 swap? Enhanced diagnostics and access to more data.
- Is this a DIY project? It can be, but requires significant electrical knowledge.
- Where can I find compatible parts? Salvage yards, online retailers, and auto parts stores.
- What is the most challenging aspect of the swap? The wiring and ensuring proper component compatibility.
- What tools are needed for the swap? Basic hand tools, wiring tools, and an OBD2 scanner.
- Can I reverse the swap? Yes, but it may require some rewiring.
- How much does a professional installation typically cost? This varies depending on location and labor rates.
Do you have more questions? Check out these articles on our website:
- OBD2 Scanner Guide for Beginners
- Troubleshooting Common OBD2 Codes
- Understanding OBD2 Protocols
For immediate assistance, contact our 24/7 customer support team via WhatsApp: +1(641)206-8880, Email: [email protected], or visit us at 789 Elm Street, San Francisco, CA 94102, USA.


