VR6 OBD2 conversion can seem daunting, but understanding the process can simplify things. This guide will explore the intricacies of converting your VR6 engine from OBD1 to OBD2, covering everything from the why to the how. We’ll delve into the benefits, challenges, and step-by-step instructions to ensure a successful conversion.
Why Convert to OBD2?
Converting your VR6 to OBD2 offers several advantages, primarily improved diagnostics and emissions control. OBD2 systems provide more comprehensive diagnostic information, making it easier to pinpoint issues and troubleshoot problems. This leads to quicker repairs and reduced downtime. Furthermore, the enhanced emissions monitoring capabilities of OBD2 contribute to a cleaner environment. The stricter emission standards enforced by OBD2 systems result in lower pollutant output, making it an environmentally responsible choice. Finally, an OBD2 system allows for better fuel efficiency management, potentially saving you money in the long run.
Upgrading to OBD2 also opens up a world of compatible aftermarket parts and tuning options. You’ll have access to a broader range of performance upgrades and diagnostic tools specifically designed for OBD2 systems.
Understanding the Challenges of VR6 OBD2 Conversion
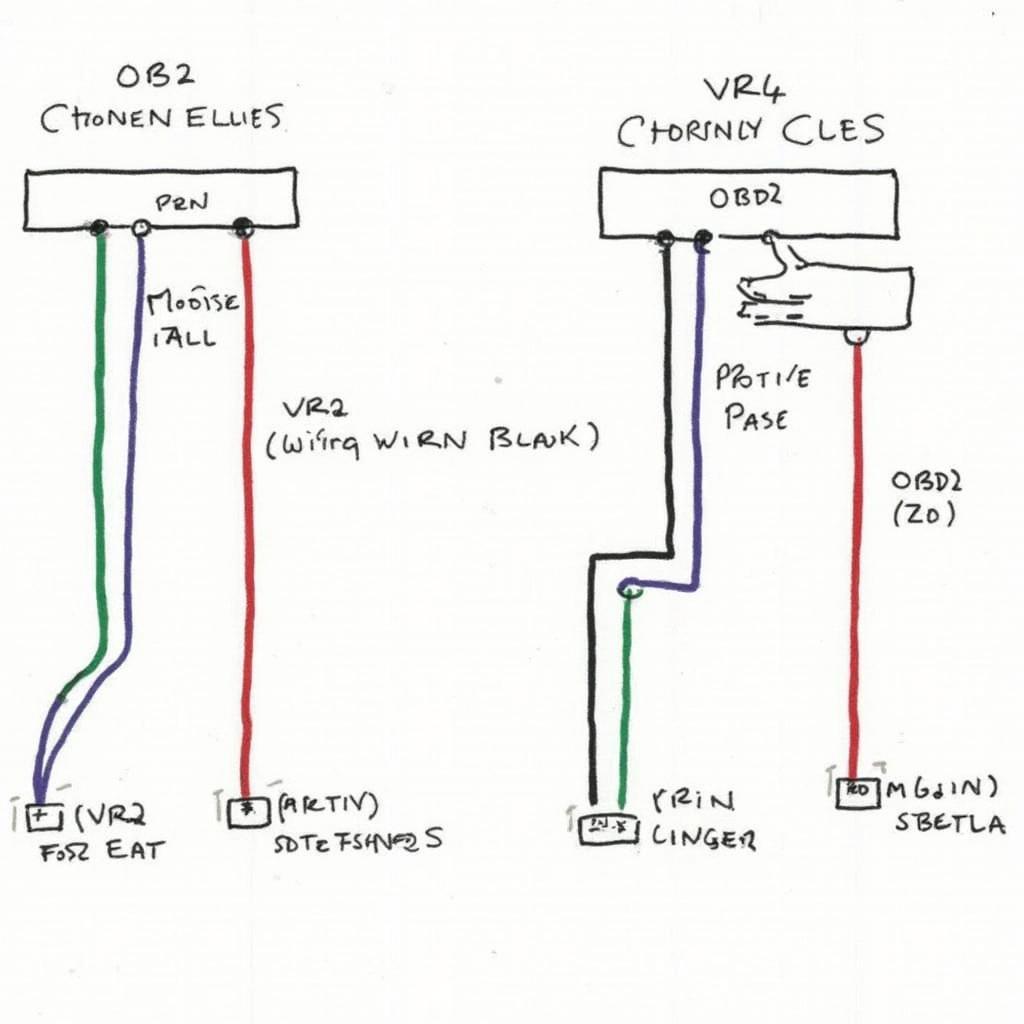
While the benefits are substantial, a VR6 OBD2 conversion is not without its challenges. One of the primary hurdles is the wiring complexity. The conversion requires meticulous wiring work, and a thorough understanding of both the OBD1 and OBD2 systems is crucial for success. Incorrect wiring can lead to malfunctions, diagnostic errors, and even damage to the engine control unit (ECU).
Another challenge is component compatibility. Ensuring that all components, including the ECU, sensors, and wiring harness, are compatible with both the engine and the OBD2 system is vital. Using incompatible parts can lead to performance issues and diagnostic errors. Careful research and selection of components are necessary to avoid these problems. For more specific information regarding VW conversions, check out vw vortex mk3 obd2 vr6 to ce2 mk2.
Step-by-Step VR6 OBD2 Conversion Guide
This section will provide a simplified overview of the conversion process. It’s highly recommended to consult a detailed wiring diagram and vehicle-specific instructions for your particular VR6 engine and model year.
Gathering the Necessary Components
The first step involves gathering all the required components. This typically includes an OBD2 compliant ECU, wiring harness, sensors (e.g., oxygen sensors, coolant temperature sensor), and any necessary adapters or connectors. Choosing high-quality components from reputable manufacturers is essential for a reliable and long-lasting conversion.
Preparing the Vehicle
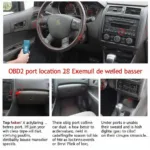
Disconnect the battery before starting any wiring work. This crucial safety precaution prevents accidental shorts and potential damage to the electrical system. Locate and identify all the necessary connectors and wiring harnesses associated with the engine management system. Understanding the existing wiring layout will be helpful during the conversion process. You might find the information on vr6 obd1 to obd2 conversion helpful.
Installing the New Components
Carefully install the new OBD2 compliant ECU, wiring harness, and sensors according to the wiring diagram and instructions. Pay close attention to the wiring connections, ensuring that each wire is connected to the correct pin and securely fastened. Double-check all connections before proceeding to the next step. Learn more about similar conversions at mk3 vr6 obd1 to obd2.
Testing and Calibration
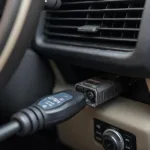
Once the installation is complete, reconnect the battery and turn on the ignition. Use an OBD2 scanner to check for any diagnostic trouble codes (DTCs). Address any codes that appear before proceeding. Calibrate the new system according to the manufacturer’s instructions. This ensures that the system is functioning correctly and providing accurate readings. Additional information about injectors can be found at obd2 injectors on obd1 ecu. Further insight into engine harnesses can be gleaned from obd2 engine harness obd1 car.
Conclusion
A VR6 OBD2 conversion offers significant benefits in terms of diagnostics, emissions control, and fuel efficiency. While the process presents some challenges, careful planning and execution can lead to a successful outcome. By following the steps outlined in this guide and consulting vehicle-specific resources, you can upgrade your VR6 to the more modern and efficient OBD2 system.
FAQs
- Is a VR6 OBD2 conversion worth the effort? Yes, the improved diagnostics, emissions control, and potential fuel savings make it a worthwhile upgrade.
- Can I perform the conversion myself? If you have experience with automotive wiring, you can attempt it. However, professional installation is recommended for those unfamiliar with complex wiring procedures.
- What tools do I need for the conversion? Essential tools include an OBD2 scanner, multimeter, wire strippers, crimpers, and various hand tools.
- Where can I find a wiring diagram for my specific VR6? Consult your vehicle’s service manual or reputable online resources specific to your model year.
- What should I do if I encounter diagnostic trouble codes after the conversion? Refer to the OBD2 code definitions and troubleshoot the issue accordingly.
For further assistance, contact us via WhatsApp: +1(641)206-8880, Email: [email protected] or visit us at 789 Elm Street, San Francisco, CA 94102, USA. Our 24/7 customer support team is ready to help.