An Arduino OBD2 monitor allows you to unlock a world of information hidden within your car’s onboard computer. This guide explores how to build your own Arduino OBD2 monitor, delve into the technical details, and answer your frequently asked questions.
Unveiling the Power of OBD2 and Arduino
Modern vehicles are equipped with an OBD2 port, a standardized interface that provides access to a treasure trove of data generated by your car’s electronic systems. By connecting an Arduino board to this port, you can tap into this data stream and gain valuable insights into your car’s performance, fuel efficiency, emissions, and potential issues.
An Arduino, a versatile microcontroller platform, acts as the brain of your OBD2 monitor. Its ability to interact with sensors, process data, and communicate with other devices makes it an ideal choice for building a customized car diagnostic tool.
Building Your Arduino OBD2 Monitor: A Step-by-Step Guide
1. Gather Your Tools and Components
Before you embark on this exciting project, you’ll need to assemble the following:
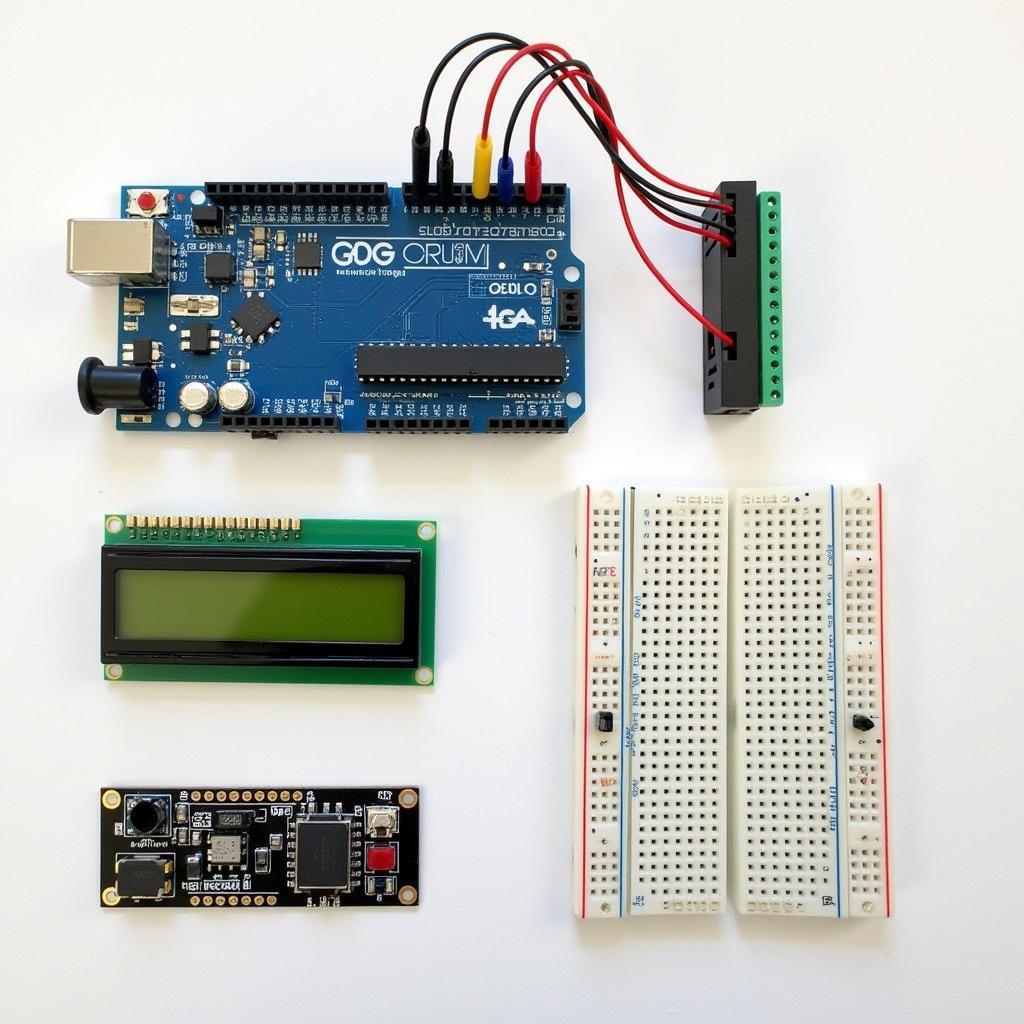
- Arduino Board: Choose an Arduino board that suits your project needs, such as the Arduino Uno or Nano.
- OBD2 Connector: This connector will act as the bridge between your Arduino and your car’s OBD2 port.
- ELM327 Adapter: This adapter translates the OBD2 protocols into a language your Arduino can understand.
- LCD Display: An LCD display will allow you to visualize the data received from your car.
- Jumper Wires: These wires will be used to make the necessary connections between components.
- Breadboard (Optional): A breadboard can be helpful for prototyping your circuit before making permanent connections.
2. Wiring Up Your Arduino OBD2 Monitor
The wiring process involves connecting the OBD2 connector, ELM327 adapter, and LCD display to your Arduino board. Refer to the pinout diagrams for your specific components and follow the instructions provided with your ELM327 adapter.
3. Programming Your Arduino OBD2 Monitor
The heart of your Arduino OBD2 monitor lies in its code. You’ll need to write a program that instructs the Arduino to communicate with the ELM327 adapter, retrieve data from the OBD2 port, process it, and display it on the LCD screen. Numerous libraries and code examples are available online to help you get started.
4. Connecting to Your Car’s OBD2 Port
Once your Arduino OBD2 monitor is assembled and programmed, it’s time to connect it to your car. Locate the OBD2 port, typically found under the dashboard on the driver’s side. Plug in the OBD2 connector and turn on your car’s ignition.
5. Monitoring Your Car’s Data
With your Arduino OBD2 monitor up and running, you can now access a wealth of real-time data from your car’s engine, transmission, emissions system, and more. This information can help you:
- Diagnose Engine Problems: Monitor parameters like engine RPM, coolant temperature, and oxygen sensor readings to identify potential issues.
- Improve Fuel Efficiency: Track fuel consumption and driving habits to optimize fuel economy.
- Monitor Emissions: Check emissions-related data to ensure your car is running cleanly.
Benefits of Building an Arduino OBD2 Monitor
- Cost-Effectiveness: Building your own OBD2 monitor is significantly more affordable than purchasing a commercial scanner.
- Customization: Tailor the monitor to your specific needs by selecting the data parameters you want to track and displaying them in your preferred format.
- Learning Opportunity: Embark on a rewarding learning experience and enhance your understanding of automotive electronics and programming.
Arduino OBD2 Monitor: FAQs
Q: Can I use any Arduino board for this project?
A: While many Arduino boards are suitable, some popular choices include the Arduino Uno and Nano due to their ease of use and availability.
Q: Where can I find OBD2 codes and their meanings?
A: Numerous online resources provide comprehensive OBD2 code databases. You can also refer to your car’s service manual.
Q: What are some advanced features I can add to my Arduino OBD2 monitor?
A: Consider incorporating features like data logging, GPS tracking, or wireless communication using Bluetooth or Wi-Fi modules.
Expanding Your Arduino OBD2 Horizons
The possibilities for your Arduino OBD2 monitor are vast. You can explore adding features like:
- OBD2 GPS Tracker App: Integrate GPS functionality to track your vehicle’s location and driving routes.
- OBD2 Digital Dash App: Create a custom digital dashboard on your smartphone or tablet to display car data in a user-friendly interface.
- MPGuino OBD2: Build an MPGuino to accurately measure your car’s fuel consumption and analyze driving efficiency.
Conclusion
Building an Arduino OBD2 monitor empowers you with a powerful tool to understand and diagnose your car’s performance. By following this comprehensive guide, you can embark on this rewarding DIY project and unlock a world of automotive insights. Whether you’re a car enthusiast, a tech hobbyist, or simply seeking an affordable car diagnostic solution, an Arduino OBD2 monitor opens doors to endless possibilities.
Need help with your car diagnostics? Contact our 24/7 customer support via WhatsApp: +1(641)206-8880 or Email: cardiagtechworkshop@gmail.com. We’re here to assist you!


