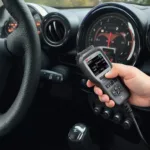
Getting your Eonon head unit connected to your car’s OBD2 port can unlock a wealth of information and features. This guide will walk you through the Eonon OBD2 install process, explaining everything from choosing the right adapter to troubleshooting common issues.
Understanding the Eonon OBD2 Connection
Why connect your Eonon head unit to the OBD2 port? Doing so allows you to access real-time vehicle data like speed, RPM, fuel consumption, and diagnostic trouble codes (DTCs). This information can be displayed directly on your Eonon screen, giving you a comprehensive overview of your car’s performance. Plus, depending on your Eonon model and the OBD2 adapter you choose, you can unlock additional functionalities like tire pressure monitoring, gauge displays, and even performance tuning.
Choosing the Right OBD2 Adapter for Your Eonon Head Unit
Not all OBD2 adapters are created equal. Some are designed for specific Eonon models, while others offer broader compatibility. When choosing an adapter, consider factors like the features you want to unlock, the compatibility with your Eonon model, and the reliability of the brand. It’s important to choose an adapter that’s compatible with both your Eonon unit and your car’s make and model.
Key Considerations for Choosing an OBD2 Adapter
- Compatibility: Ensure the adapter is specifically designed for Eonon head units and your car model.
- Features: Determine which features you want, such as DTC reading, gauge displays, or tire pressure monitoring.
- Brand Reputation: Choose a reputable brand known for quality and reliability.
Step-by-Step Eonon OBD2 Installation Guide
Installing the OBD2 adapter is usually a straightforward process. Follow these steps for a successful Eonon OBD2 install:
- Locate your car’s OBD2 port: Typically found under the dashboard, near the steering wheel.
- Connect the OBD2 adapter: Plug the adapter firmly into the OBD2 port.
- Connect the other end of the adapter: This might connect directly to the back of your Eonon unit or require a separate cable. Refer to your head unit and adapter manuals.
- Power on your Eonon head unit: The system should automatically recognize the OBD2 adapter.
- Configure the OBD2 settings: Access the OBD2 settings within your Eonon’s menu to customize the displayed information.
Troubleshooting Common Eonon OBD2 Installation Issues
- No Connection: Double-check all connections and ensure the adapter is compatible.
- Inaccurate Readings: Ensure the correct OBD2 protocol is selected in the Eonon settings.
- Error Messages: Consult your Eonon and adapter manuals for troubleshooting specific error codes.
“A properly installed OBD2 adapter can transform your Eonon head unit into a powerful diagnostic and performance monitoring tool,” says automotive electronics expert, Michael Stevens, from Automotive Electronics Solutions.
Conclusion
Connecting an OBD2 adapter to your Eonon head unit offers a simple way to enhance your driving experience with valuable real-time vehicle data. By following this guide for eonon obd2 install, you can unlock the full potential of your Eonon system.
FAQ
- Is the OBD2 adapter universal for all Eonon head units? No, compatibility varies. Always check your Eonon model’s specifications.
- Can I install the OBD2 adapter myself? Yes, it’s usually a simple plug-and-play process.
- Where can I find compatible OBD2 adapters? Check online retailers or authorized Eonon dealers.
- What if my Eonon doesn’t recognize the OBD2 adapter? Verify compatibility and check connections.
- Can I use the OBD2 adapter with other apps? It depends on the adapter and your Eonon model.
- What data can I see with the OBD2 connection? Speed, RPM, fuel consumption, DTCs, and more, depending on the adapter.
- What if I encounter error codes after installation? Consult your Eonon and adapter manuals for specific troubleshooting steps.
For further assistance, please contact us via WhatsApp: +1(641)206-8880, Email: [email protected] or visit us at 789 Elm Street, San Francisco, CA 94102, USA. Our 24/7 customer support team is ready to help.
