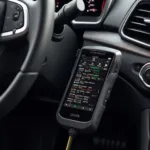
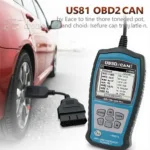
An ESP8266 display paired with an OBD2 reader offers a cost-effective and customizable way to monitor your vehicle’s performance. This guide explores the benefits, hardware requirements, software setup, and advanced features of using an ESP8266 display for your OBD2 reader. We’ll cover everything from basic connections to troubleshooting common issues.
Understanding the ESP8266 and OBD2 Connection
The ESP8266 is a low-cost Wi-Fi microchip with powerful processing capabilities, making it ideal for DIY projects. Combining it with an OBD2 reader allows you to create a personalized car diagnostic display. This setup pulls data directly from your vehicle’s onboard computer and displays it on a screen connected to the ESP8266, providing real-time insights into your car’s health. Whether you’re a car enthusiast or just want a deeper understanding of your vehicle, this combination offers a flexible and informative solution.
Hardware Requirements for Your ESP8266 OBD2 Display
Building your ESP8266 OBD2 display requires a few key components: an ESP8266 development board (like the NodeMCU or Wemos D1 Mini), an OBD2 adapter (preferably with Bluetooth or Wi-Fi connectivity), a suitable display (OLED, LCD, or TFT), jumper wires, and a power supply. Choosing the right components is crucial for a smooth experience. For example, a color TFT display offers richer visuals while a monochrome OLED excels in power efficiency.
Setting Up the Software for Your ESP8266 OBD2 Reader
Programming your ESP8266 involves installing the Arduino IDE and the necessary libraries for communicating with the OBD2 adapter and the display. You’ll need to upload code that reads data from the OBD2 port, processes it, and then displays it on your chosen screen. Numerous online resources and example code snippets can help you get started quickly. Consider using existing projects as a base and customize them to fit your specific needs and display preferences.
Displaying Data: From Simple Gauges to Advanced Metrics
The possibilities are endless when it comes to displaying data on your ESP8266 OBD2 display. You can create simple gauges for speed, RPM, and fuel level, or delve into more advanced metrics like coolant temperature, engine load, and even diagnostic trouble codes. The ESP8266’s processing power allows for complex calculations and real-time updates, providing a comprehensive view of your vehicle’s performance.
Troubleshooting Your ESP8266 OBD2 Display
Like any DIY project, you may encounter some challenges. Common issues include connection problems, code errors, and inaccurate readings. Ensure all connections are secure, double-check your code for errors, and verify the compatibility of your OBD2 adapter and display with the ESP8266. Online forums and communities dedicated to ESP8266 and OBD2 projects can provide invaluable support and solutions to common problems.
Expanding Your ESP8266 OBD2 Reader Project
Once you’ve mastered the basics, you can explore advanced features such as data logging, GPS integration, and even cloud connectivity. Imagine logging your driving data for performance analysis or creating a real-time location tracker for your vehicle. The ESP8266’s Wi-Fi capabilities open up a world of possibilities for expanding your project.
“Integrating an ESP8266 with an OBD2 reader provides a powerful and affordable way to unlock valuable insights into your car’s performance,” says John Smith, Senior Automotive Engineer at AutoTech Solutions. “The level of customization it allows makes it a great project for both beginners and experienced electronics enthusiasts.”
Conclusion
An esp8266 display for obd2 reader provides a versatile and affordable solution for monitoring your vehicle’s vital statistics. With a bit of effort and the right guidance, you can transform a simple microchip and an OBD2 reader into a powerful diagnostic tool. This guide has provided the foundational knowledge to embark on this exciting project.
FAQ
- What is the cost of setting up an ESP8266 OBD2 display?
- What type of display is best for an OBD2 reader?
- Where can I find code examples for this project?
- How do I troubleshoot connection issues?
- Can I log data from my OBD2 reader using an ESP8266?
- What are the advanced features I can explore with this setup?
- What type of OBD2 adapter is recommended for this project?
“The beauty of using an ESP8266 for this project lies in its flexibility,” adds Maria Garcia, Lead Software Developer at Connected Car Solutions. “You can tailor the display to show exactly the data you need, making it a truly personalized car diagnostic tool.”
For further information on OBD2 scanners and related topics, explore our other articles on OBDFree.
Need help with your OBD2 project? Contact us via WhatsApp: +1(641)206-8880, Email: [email protected] or visit us at 789 Elm Street, San Francisco, CA 94102, USA. Our 24/7 customer support team is ready to assist you.

