Flush mounting your OBD2 scanner is a popular way to achieve a clean, integrated look in your vehicle’s interior while retaining easy access to your car’s diagnostic port. Instead of a dangling wire and a scanner that’s always in the way, a flush mount solution provides a professional finish and keeps your scanner readily available. This article will explore the benefits, considerations, and step-by-step guide to installing a flush mount OBD2 setup.
Understanding Flush Mount OBD2
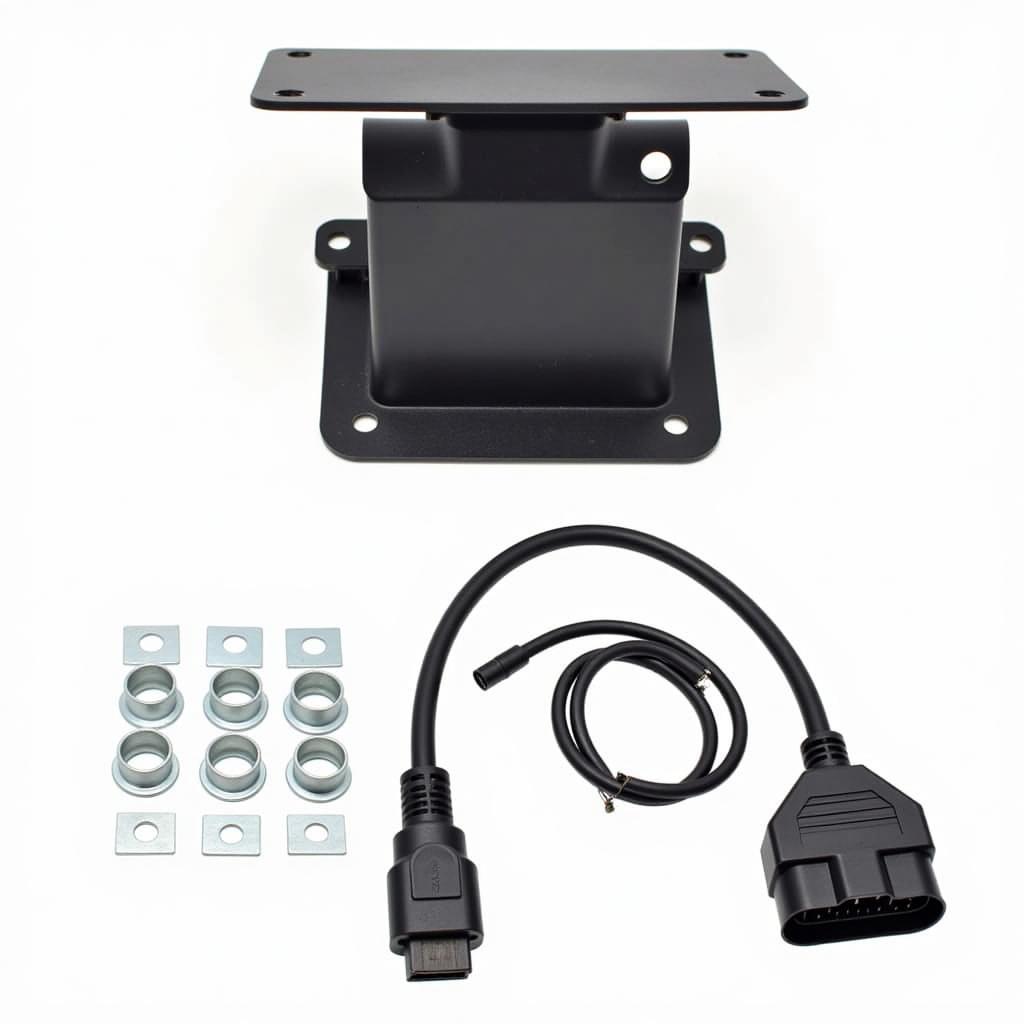
A flush mount OBD2 installation involves relocating your vehicle’s OBD2 port to a more convenient and aesthetically pleasing location using an extension cable and a specialized mount. This setup eliminates cable clutter and allows you to neatly integrate your OBD2 scanner into your dashboard or another discreet location.
Advantages of a Flush Mount OBD2 Setup
There are numerous benefits to opting for a flush mount OBD2 setup:
- Enhanced Aesthetics: Say goodbye to unsightly wires and scanners dangling from your dashboard. A flush mount provides a clean, factory-installed look.
- Improved Accessibility: Place your OBD2 scanner in a convenient location for easy viewing and operation.
- Reduced Clutter: Eliminate cable clutter and free up valuable space in your vehicle’s interior.
- Protection from Damage: A flush mount can help protect your OBD2 port and scanner from accidental damage.
Choosing the Right Flush Mount OBD2 Kit
 Flush Mount OBD2 Kit Components
Selecting the right flush mount OBD2 kit is crucial for a successful installation. Here are key factors to consider:
- Cable Length: Determine the appropriate cable length based on the desired mounting location and the distance to your vehicle’s OBD2 port.
- Mount Type: Choose a mount that complements your vehicle’s interior and provides a secure fit. Options include panel mount, dash mount, or custom installations.
- Compatibility: Ensure the kit is compatible with your vehicle’s OBD2 port and the scanner you intend to use.
How to Install a Flush Mount OBD2 Scanner
Installing a flush mount OBD2 scanner is a straightforward process that most vehicle owners can handle with basic tools. Here’s a general guide:
- Locate Your Vehicle’s OBD2 Port: The OBD2 port is typically located under the dashboard on the driver’s side.
- Choose a Mounting Location: Select a suitable location for the flush mount, ensuring adequate cable reach and accessibility.
- Connect the Extension Cable: Connect one end of the extension cable to your vehicle’s OBD2 port and the other end to the female port on the flush mount housing.
- Secure the Flush Mount: Depending on the mount type, you’ll need to drill a hole or use adhesive tape to secure the flush mount to your chosen location.
- Route and Secure the Cable: Neatly route the extension cable along existing wiring, securing it with cable ties to prevent it from dangling.
- Test the Connection: Plug your OBD2 scanner into the flush mount port and turn on your vehicle’s ignition to ensure the connection is secure and the scanner powers on.
Flush Mounting and OBD2 Codes: What You Need to Know
A flush mount setup doesn’t interfere with reading or clearing OBD2 codes. Your scanner will function the same way, just in a more convenient location. If you experience trouble codes after installing a flush mount, it’s unlikely due to the installation itself. However, it’s always wise to double-check the connections and ensure the cable is routed properly.
Expert Insight
“A flush mount OBD2 setup is an excellent way to achieve a professional look and enhance the functionality of your diagnostic tools,” says John Davis, a senior automotive technician with over 20 years of experience. “It’s a relatively simple modification that can make a big difference in the user experience.”
Conclusion
A flush mount OBD2 setup offers a practical and aesthetically pleasing solution for accessing your vehicle’s diagnostic port. It eliminates cable clutter, improves accessibility, and adds a touch of sophistication to your vehicle’s interior. By following the installation steps and choosing the right kit, you can easily enjoy the benefits of a flush mount OBD2 system.
Need help diagnosing a check engine light? Check out our article on obd2 p0300 jeep for a common issue and how to troubleshoot it. You can also find helpful information about using an obd2 monitor on 2001 jeep wrangler.
FAQs
1. Will a flush mount OBD2 affect my vehicle’s warranty?
Installing a flush mount OBD2 setup typically does not affect your vehicle’s warranty as long as it is installed correctly and doesn’t involve modifying the vehicle’s electrical system. However, it’s always best to consult your vehicle’s owner’s manual or contact your dealer to confirm.
2. Can I install a flush mount OBD2 myself?
Yes, most flush mount OBD2 kits are designed for easy installation with basic tools. If you’re comfortable with simple automotive tasks, you should be able to install it yourself.
3. What if my chosen mounting location doesn’t have a flat surface?
Some flush mount kits come with adjustable mounts or brackets that can accommodate curved surfaces. You can also purchase these separately if needed.
4. Can I use a flush mount OBD2 with any scanner?
Make sure the flush mount kit you choose is compatible with the OBD2 connector on your scanner. Most standard OBD2 scanners will work.
5. Where can I find a reliable flush mount OBD2 kit?
OBDFree offers a curated selection of high-quality flush mount OBD2 kits from reputable brands. Visit our website to browse our inventory.
Looking for more information on OBD2 scanners and vehicle diagnostics? Explore our comprehensive guides and reviews at OBDFree.com. We’re your trusted resource for all things OBD2!
Need personalized assistance? Contact our expert team via WhatsApp: +1(641)206-8880 or Email: [email protected] for 24/7 support.

