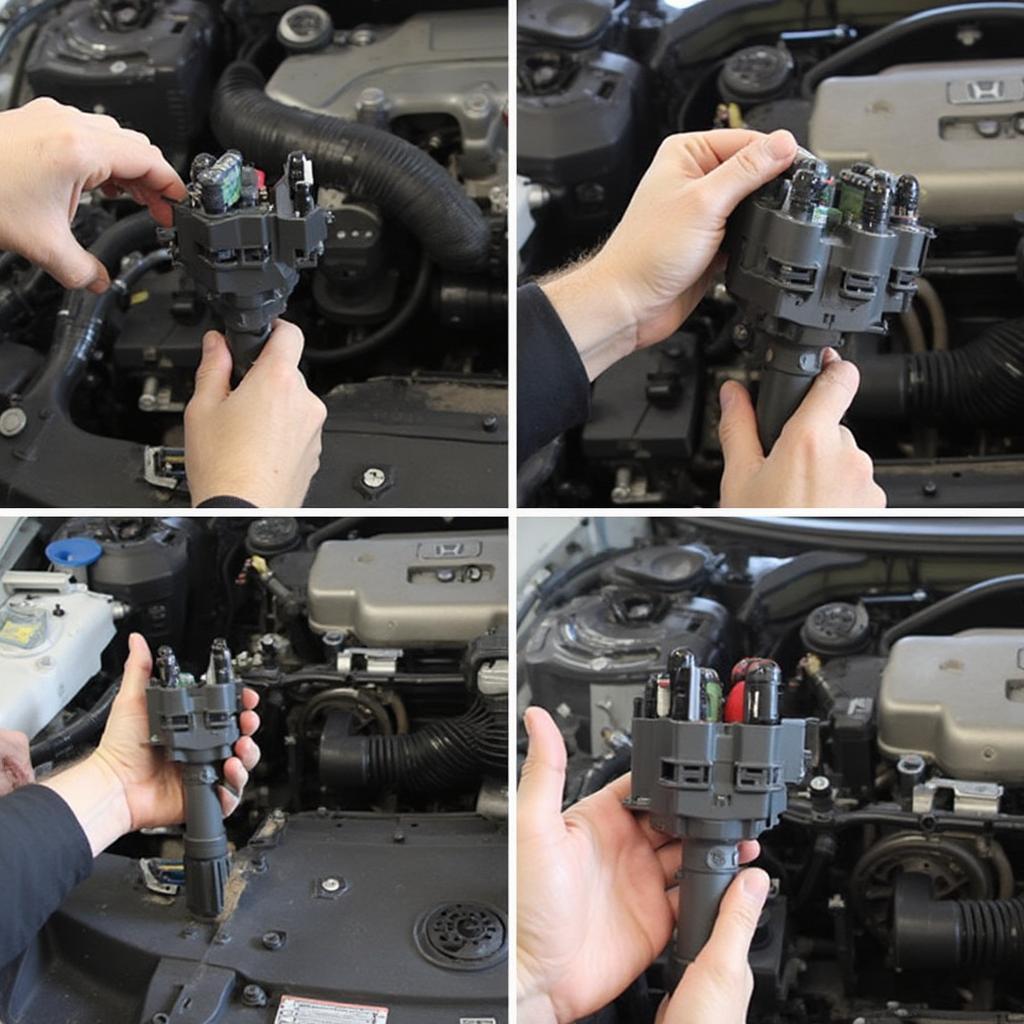
Converting your Honda from OBD2 to OBD1 distribution can seem daunting, but with the right knowledge and approach, it can be a manageable project. This conversion is popular amongst Honda enthusiasts, often for engine swaps or to utilize older engine management systems. This guide will cover everything you need to know about the Honda OBD2 to OBD1 distributor conversion.
Understanding the differences between OBD1 and OBD2 systems is crucial for a successful conversion. OBD2 (On-Board Diagnostics 2) is a standardized system introduced in 1996 designed for improved emissions monitoring and diagnostics. OBD1, its predecessor, varies more between manufacturers and specific models. A primary motivation for the OBD2 to OBD1 conversion is often the desire for simpler tuning options and perceived reliability of the older systems. This conversion allows for the use of chipped ECUs (Engine Control Units) which provide greater control over engine parameters. Immediately after this introduction, you’ll find a helpful resource on a related topic: honda obd1 to obd2 distributor adapter.
Why Convert to OBD1?
Many Honda owners appreciate the simplicity and affordability of OBD1 systems, particularly for performance tuning. Aftermarket support for OBD1 is extensive, offering a wide range of tuning options and performance parts. The conversion can also simplify troubleshooting and maintenance.
Benefits of OBD1
- Simpler tuning options
- Wider range of aftermarket support
- Easier troubleshooting
Planning Your Conversion
Before you start, thorough planning is essential. Research your specific Honda model and engine code to determine the correct parts and procedures. Gathering the necessary tools and components beforehand will save you time and frustration.
Essential Components
- OBD1 Distributor
- OBD1 ECU
- Conversion Harness (or DIY skills)
- Jumper Harness
- Timing Light
The Conversion Process
The conversion process involves swapping the distributor, ECU, and wiring harness. Precisely following the steps for your specific Honda model is critical. Timing the engine correctly after the conversion is vital for proper performance and to prevent engine damage.
Step-by-Step Guide
- Disconnect the battery negative terminal.
- Remove the OBD2 distributor.
- Install the OBD1 distributor.
- Connect the conversion harness.
- Install the OBD1 ECU.
- Connect the jumper harness.
- Time the engine.
- Reconnect the battery negative terminal.
Common Issues and Troubleshooting
Encountering issues during or after the conversion is not uncommon. Understanding potential problems and their solutions will help you overcome any challenges. Check for proper wiring connections and ensure the timing is accurate.
Troubleshooting Tips
- Verify all connections are secure.
- Double-check the timing.
- Consult online forums and resources.
Looking for specific information about swapping an OBD2 motor into an OBD1 Honda? Check out this guide: obd2 motor in obd1 car honda.
Tuning Your Converted Honda
After a successful conversion, tuning is crucial for optimizing performance and drivability. Chipped ECUs offer a wide range of adjustable parameters to fine-tune your engine. Consider consulting a professional tuner for optimal results.
“Proper tuning is paramount after an OBD2 to OBD1 conversion. It’s the key to unlocking the full potential of your Honda’s engine,” says renowned Honda tuning specialist, John Davis.
Conclusion
Converting your Honda from OBD2 to OBD1 distribution offers several advantages, including simpler tuning and potential cost savings. Careful planning, accurate execution, and proper tuning are essential for a successful conversion. With the information provided in this guide, you can confidently tackle this project and enjoy the benefits of an OBD1 system. Consider checking out this resource: 1994 honda civic ex obd1 to obd2 conversion. Remember, a well-executed honda obd2 to obd1 distributor conversion can significantly enhance your Honda’s performance and tuning capabilities.
FAQ
- Why would I want to convert to OBD1? For simpler tuning and wider aftermarket support.
- What parts do I need for the conversion? An OBD1 distributor, ECU, conversion harness, and jumper harness.
- How do I time the engine after the conversion? Use a timing light and follow the procedures for your specific Honda model.
- What are some common issues with the conversion? Wiring problems and incorrect timing.
- Where can I get help with the conversion? Online forums, Honda specialists, or resources like diy obd2 to obd1 conversion harness.
- Can I convert back to OBD2 if I want to? Yes, with the correct parts and procedures.
- Is it legal to convert to OBD1? Check local regulations regarding emissions compliance.
Common Conversion Scenarios
- Swapping a newer OBD2 engine into an older OBD1 chassis.
- Using an OBD1 engine management system for performance tuning.
- Troubleshooting issues with an existing OBD2 system.
Further Research
- Research your specific Honda model and engine code for detailed instructions.
- Consult online forums and communities for advice and troubleshooting tips.
- Consider contacting a professional Honda tuner for assistance.
- More about using an OBD2 head with an OBD1 block: h22 obd2 head with obd1 block
Need assistance with your Honda OBD2 to OBD1 conversion? Contact our 24/7 support team via WhatsApp: +1(641)206-8880 or Email: [email protected].


