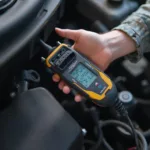
Learning how to install an OBD2 port can be incredibly useful for car enthusiasts and professionals alike. Whether you’re adding an aftermarket port, replacing a faulty one, or undertaking a custom installation, understanding the process is key to a successful outcome. This guide provides a comprehensive overview of OBD2 port installation, covering various scenarios and providing practical tips to ensure a smooth installation process.
Understanding the OBD2 Port and Its Location
Before diving into the installation, let’s clarify what the OBD2 port is and where it’s typically located. The OBD2 port, also known as the diagnostic link connector (DLC), is a standardized 16-pin connector used to access a vehicle’s onboard computer system. It’s primarily used for diagnostics, allowing mechanics and car owners to retrieve diagnostic trouble codes (DTCs), monitor vehicle performance, and access other vital data. The standard location for the OBD2 port is within two feet of the steering wheel, typically underneath the driver’s side dashboard. However, its exact location can vary depending on the vehicle’s make and model. Some vehicles might have it hidden behind a panel or near the center console. install obd2 port
Preparing for OBD2 Port Installation
Proper preparation is crucial for a successful installation. Before you begin, gather the necessary tools and materials. You’ll typically need:
- A new OBD2 port and wiring harness
- Wire strippers and crimpers
- Electrical tape and connectors
- Mounting hardware (screws, zip ties, etc.)
- A multimeter (optional but recommended)
- Your vehicle’s wiring diagram
Having the correct tools and a clear understanding of your vehicle’s wiring will significantly simplify the process and minimize potential issues.
Step-by-Step OBD2 Port Installation Guide
Installing a New OBD2 Port
- Locate the existing OBD2 port or the desired installation location. If replacing a faulty port, disconnect it from the vehicle’s wiring harness.
- Connect the wiring harness of the new OBD2 port to the vehicle’s wiring harness. Refer to your vehicle’s wiring diagram to ensure correct connections. Each wire in the OBD2 connector has a specific function, so precise wiring is essential. install new obd2 port
- Securely mount the new OBD2 port using the appropriate mounting hardware. This might involve screwing it into a bracket or using zip ties to secure it in place.
- Test the connection using an OBD2 scanner. Ensure that the scanner can communicate with the vehicle’s computer system.
Replacing a Faulty OBD2 Port
The process for replacing a faulty port is very similar to installing a new one. The key difference is that you’ll need to remove the old port first. obd2 porr failurw
Installing an OBD2 Port in a Custom Location
Installing an OBD2 port in a non-standard location requires more planning and consideration. You may need to extend the wiring harness and find a suitable mounting location. Ensure the chosen location is easily accessible for diagnostic purposes. obd2 port mounting
“A common mistake during installation is incorrect wiring. Double-check your connections with the wiring diagram to avoid potential damage,” advises Michael Stevens, a certified automotive technician with over 20 years of experience.
Troubleshooting Common OBD2 Port Installation Issues
Sometimes, you might encounter issues during installation. Here are some common problems and how to address them:
- Loose Connections: Double-check all wiring connections to ensure they are secure and properly crimped.
- Blown Fuse: Check the fuse box for any blown fuses related to the OBD2 port circuit.
- Incorrect Wiring: Verify the wiring connections against your vehicle’s wiring diagram. A multimeter can help identify incorrect wiring.
- Faulty OBD2 Port: If you suspect the new port is faulty, try replacing it with another one.
“Always refer to your vehicle’s specific wiring diagram. Generic diagrams may not accurately reflect your vehicle’s wiring, potentially leading to misconnections,” cautions Sarah Chen, an electrical systems engineer specializing in automotive diagnostics. obd2 port install ls swap
Conclusion
Knowing how to install an OBD2 port empowers you to maintain and diagnose your vehicle effectively. By following the steps outlined in this guide and taking necessary precautions, you can successfully install or replace your OBD2 port. Remember to always consult your vehicle’s wiring diagram and double-check your connections for a safe and functional installation.
FAQ
- What tools do I need to install an OBD2 port? You’ll typically need wire strippers, crimpers, electrical tape, connectors, mounting hardware, and your vehicle’s wiring diagram.
- Where is the OBD2 port located in most vehicles? It’s usually located within two feet of the steering wheel, under the driver’s side dashboard.
- What should I do if my OBD2 scanner doesn’t communicate with the vehicle after installation? Double-check the wiring connections, check the relevant fuse, and ensure the new port isn’t faulty.
- Can I install an OBD2 port in a custom location? Yes, but it requires careful planning and consideration of wiring extensions and accessibility.
- Where can I find my vehicle’s wiring diagram? You can typically find it in your vehicle’s repair manual or online resources.
- Why is my OBD2 port not working? Possible reasons include a blown fuse, loose connections, a faulty OBD2 port, or issues with the vehicle’s computer system.
- What if I accidentally connect the wires incorrectly? Consult a professional mechanic immediately to avoid potential damage to the vehicle’s electrical system.
Do you have other questions related to OBD2 ports, diagnostics, or vehicle maintenance? Check out our other helpful articles on our website.
Need assistance with your OBD2 port installation? Contact us via WhatsApp: +1(641)206-8880, Email: [email protected], or visit our office at 789 Elm Street, San Francisco, CA 94102, USA. Our 24/7 customer support team is ready to help.
