Upgrading your car stereo with a new Pioneer head unit can significantly enhance your driving experience. However, integrating it seamlessly with your vehicle’s electronics and retaining steering wheel controls often requires an interface module like the iDataLink Maestro RR. This comprehensive guide will walk you through the installation process, ensuring a successful integration of your iDataLink Maestro RR with a Pioneer head unit and your vehicle’s OBD2 port.
Understanding the iDataLink Maestro RR and its Benefits
The iDataLink Maestro RR is more than just a wiring harness; it’s a sophisticated interface module that bridges the gap between your aftermarket head unit and your car’s electronics. Here’s what makes it essential for a smooth and feature-rich upgrade:
- Retained Steering Wheel Controls: Maintain the convenience and safety of controlling your audio system from your steering wheel.
- Vehicle Data Integration: Display vital vehicle information like gauges, climate control settings, and parking sensor data on your Pioneer head unit.
- Enhanced Sound Customization: The Maestro RR allows you to fine-tune your audio output using the head unit’s built-in equalizer and sound processing features.
What You’ll Need for the Installation
Before you begin, gather the following tools and materials:
- iDataLink Maestro RR Interface Module: Ensure compatibility with your specific vehicle and Pioneer head unit model.
- Pioneer Head Unit Wiring Harness: This connects your head unit to the Maestro RR and your car’s wiring system.
- USB to Mini-USB Cable: Used to program the Maestro RR with your vehicle’s specifications.
- Trim Removal Tools: These help safely pry open panels and access wiring without damaging your dashboard.
- Wire Strippers and Crimpers: Essential for making secure connections between wires.
- Electrical Tape: Used to insulate and protect exposed wires.
- Zip Ties: Help keep your wiring organized and secure.
Step-by-Step Installation Guide
Follow these steps carefully for a successful installation:
-
Disconnect Your Car’s Battery: Before you begin any electrical work, disconnect the negative terminal of your car’s battery as a safety precaution.
-
Remove Your Factory Radio: Use the appropriate trim removal tools to carefully pry open the dashboard panels surrounding your factory radio. Once the panels are removed, unscrew and disconnect the radio from its mounting brackets.
-
Connect the Maestro RR to Your Pioneer Head Unit: Using the provided wiring diagrams for both the Maestro RR and your Pioneer head unit, connect the corresponding wires from the Maestro RR harness to the Pioneer wiring harness. This step ensures that power, ground, speaker connections, and other essential signals are properly routed.
-
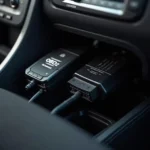
Connect the Maestro RR to Your Vehicle’s OBD2 Port: Locate the OBD2 port under your dashboard, usually near the steering column. Plug the Maestro RR’s OBD2 connector into the port.
-
Program the Maestro RR: Using the USB to Mini-USB cable, connect the Maestro RR to your computer. Visit the iDataLink website and download the latest firmware and configuration software for your specific Maestro RR model. Follow the on-screen instructions to select your vehicle’s make, model, and year. Choose the desired features you want to retain, such as steering wheel controls and vehicle data displays. Once the programming is complete, disconnect the Maestro RR from your computer.
-
Reconnect Your Car Battery: Reconnect the negative terminal of your car’s battery.
-
Test Your Installation: Power on your Pioneer head unit and verify that it functions correctly. Check that the speakers are working, steering wheel controls are responsive, and any retained vehicle data displays appear on the head unit’s screen.
-
Reassemble Your Dashboard: Carefully tuck away all the wiring and secure any loose cables with zip ties. Reinstall the dashboard panels and ensure they snap back into place securely.
Troubleshooting Tips
- Steering Wheel Controls Not Working: Double-check the wiring connections between the Maestro RR and your Pioneer head unit’s steering wheel control input. Ensure you’ve programmed the correct steering wheel control buttons during the Maestro RR configuration.
- Vehicle Data Not Displaying: Verify that you selected the correct vehicle make, model, and year during the Maestro RR programming. Some vehicle features may require additional adapters or modules for compatibility.
- Audio Sound Issues: Check the speaker wiring connections for any loose or incorrect wiring. Ensure the correct speaker settings are configured in your Pioneer head unit’s audio settings menu.
Conclusion
By following this detailed guide, you can confidently install the iDataLink Maestro RR with your Pioneer head unit and retain valuable features like steering wheel controls and vehicle data integration. Remember to consult your vehicle and head unit manuals for specific instructions and wiring diagrams. Enjoy a seamless and enhanced driving experience with your upgraded car stereo system.


