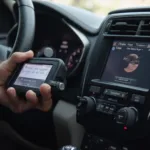
Replacing a faulty or damaged OBD2 connector on your Nissan Sentra can be a straightforward process if you have the right information and tools. This guide will walk you through everything you need to know about nissan sentra obd2 connector replacement, from identifying the location of the connector to troubleshooting common issues.
Locating your Nissan Sentra’s OBD2 connector is the first step. It’s typically situated under the driver’s side dashboard, near the steering column. 2005 nissan sentra obd1 or obd2 vehicles and later models use OBD2. Once located, inspect the connector for any signs of damage, such as bent pins or loose wiring.
Why Replace Your OBD2 Connector?
A malfunctioning OBD2 connector can prevent communication between your Sentra and diagnostic tools. This can hinder your ability to read and clear trouble codes, monitor vehicle performance, and perform essential maintenance tasks. Common reasons for replacement include physical damage, corrosion, and wiring issues.
Signs of a Faulty OBD2 Connector
- Difficulty connecting diagnostic scanners
- Intermittent connection problems
- Inability to retrieve diagnostic data
- Bent or broken pins
- Loose or damaged wiring
How to Replace Your Nissan Sentra’s OBD2 Connector
Replacing the OBD2 connector on your Nissan Sentra is a relatively simple task that you can often do yourself.
- Disconnect the battery: This is a crucial safety precaution to prevent electrical shorts.
- Locate the OBD2 connector: As mentioned, it’s usually located under the driver’s side dashboard.
- Detach the connector: Carefully disconnect the existing connector from its housing. This may involve releasing a clip or unscrewing a retaining bolt.
- Inspect the wiring: Check for any damage or corrosion on the wiring harness. If necessary, repair or replace any damaged wires.
- Connect the new connector: Attach the new OBD2 connector to the wiring harness, ensuring a secure and proper connection.
- Reattach the connector housing: Secure the connector and its housing back into its original position.
- Reconnect the battery: After completing the replacement, reconnect the battery.
- Test the connection: Use a diagnostic scanner to verify that the new connector is functioning correctly.
Troubleshooting Common Issues
Sometimes, even after replacing the connector, you might still encounter problems.
No Power to the OBD2 Port
If your scanner isn’t powering up, check the fuse related to the OBD2 port. Consult your Sentra’s owner’s manual for the specific fuse location.
Intermittent Connection
This could indicate a loose connection or a damaged wire within the harness. Carefully inspect the wiring and ensure all connections are secure.
“A common oversight is not fully seating the new connector. Double-check that it’s firmly attached to the wiring harness.” – John Miller, Automotive Diagnostics Specialist
Choosing the Right Replacement Connector
When purchasing a replacement, ensure compatibility with your specific Nissan Sentra model year. You can obd2 code p0128 using a quality OBD2 scanner. Using a compatible connector will prevent potential communication errors and ensure accurate diagnostic results.
“Always invest in a high-quality replacement connector. A cheap, poorly made connector can lead to future problems.” – Maria Sanchez, Certified Mechanic
In conclusion, nissan sentra obd2 connector replacement is a manageable task that can improve your vehicle’s diagnosticability. Following the steps outlined in this guide will help you perform the replacement effectively and avoid common issues.
FAQ
-
Where can I find the OBD2 connector on my Nissan Sentra? It’s usually located under the driver’s side dashboard, near the steering column.
-
How much does a replacement OBD2 connector cost? Prices vary but typically range from $10 to $30.
-
Do I need special tools to replace the connector? Basic tools like a screwdriver and a wrench are usually sufficient.
-
What if the new connector doesn’t work? Double-check the connections and the related fuse.
-
Can I replace the connector myself? Yes, it’s a relatively simple DIY task.
If you need further assistance, don’t hesitate to contact us via WhatsApp: +1(641)206-8880, Email: [email protected] or visit us at 789 Elm Street, San Francisco, CA 94102, USA. Our 24/7 customer support team is ready to help.
