OBD2 Arduino projects offer a fascinating gateway into the world of automotive diagnostics. By combining the versatility of Arduino with the standardized OBD2 interface, car enthusiasts and developers can unlock a wealth of information hidden within their vehicles. This allows for customized diagnostics, data logging, and even performance tuning, all at a fraction of the cost of professional tools. Let’s delve into the exciting possibilities of OBD2 Arduino.
Using an Arduino with an OBD2 interface opens up a world of possibilities. You can monitor real-time data like engine speed, coolant temperature, and fuel consumption. Beyond simple monitoring, you can log this data for later analysis, helping you identify trends and potential issues. More advanced users can even develop custom applications for performance tuning and diagnostics. Want to build your own trip computer or a custom gauge display? OBD2 Arduino makes it possible! Learn more about combining Bluetooth, OBD2, and Arduino with a CAN bus at bluetooth obd2 arduino can bus.
Understanding OBD2 and its Arduino Integration
OBD2, or On-Board Diagnostics II, is a standardized system present in most modern vehicles. It provides access to a wealth of diagnostic data, enabling mechanics and car owners to troubleshoot issues and monitor vehicle performance. Arduino, a versatile open-source microcontroller platform, can be interfaced with the OBD2 port to tap into this data stream.
Hardware and Software Requirements for OBD2 Arduino Projects
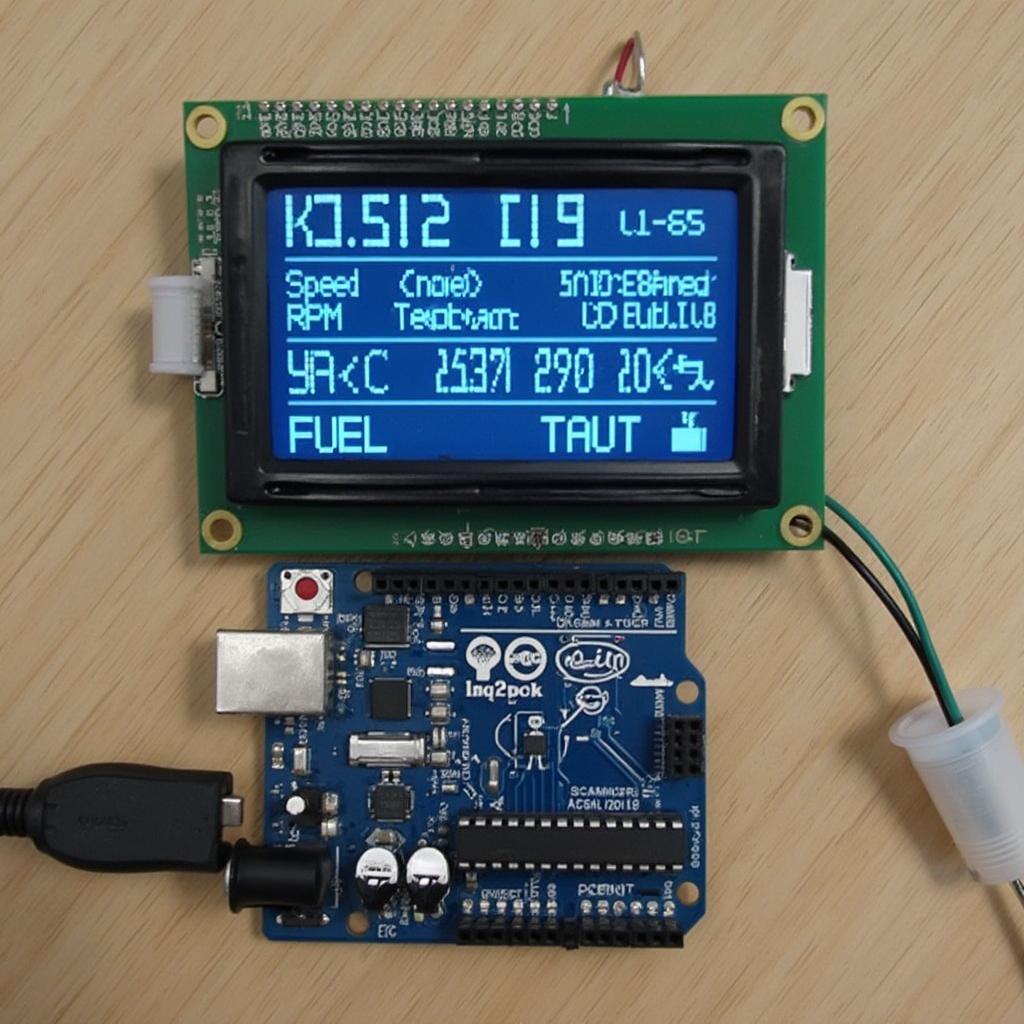
To get started with OBD2 Arduino, you’ll need a few essential components. Firstly, you’ll need an Arduino board, such as the popular Arduino Uno. Next, you’ll require an OBD2 adapter or shield that allows the Arduino to communicate with the vehicle’s OBD2 port. Several options are available, including those based on the ELM327 chip. Finally, you’ll need the appropriate software libraries and code to interpret the OBD2 data. Detailed schematics are available for those wanting a deeper understanding of the hardware connections. Check out our detailed obd2 arduino schematic for a comprehensive guide.
Decoding the Data: OBD2 PIDs and Arduino
OBD2 data is transmitted using specific Parameter IDs, or PIDs. These PIDs represent various parameters such as engine speed, coolant temperature, and fuel level. Your Arduino code will need to request these PIDs from the vehicle’s ECU (Engine Control Unit) and then interpret the responses. There are hundreds of PIDs available, allowing you to monitor a wide range of vehicle parameters.
Building Your First OBD2 Arduino Project
A simple project to start with is a real-time speedometer display. By requesting the vehicle speed PID, you can display the current speed on an LCD screen connected to your Arduino. This project provides a great introduction to OBD2 communication and data handling. For those using the Arduino Uno R3, you can find specific instructions and code examples tailored to this popular board. Learn more about using the arduino uno r3 obd2 on our website.
Advanced OBD2 Arduino Applications
Beyond basic data monitoring, you can develop more sophisticated applications. Imagine logging data to an SD card for later analysis, or creating a custom trip computer that calculates fuel efficiency and distance traveled. With a CAN bus shield, you can even access more advanced data on vehicles that support CAN communication. Explore the possibilities of the arduino can bus shield obd2 for even more advanced projects.
“The beauty of OBD2 Arduino is its flexibility,” says Dr. Eleanor Vance, Automotive Electronics Engineer. “You’re limited only by your imagination. From simple diagnostics to complex data analysis, the possibilities are endless.”
Troubleshooting Common OBD2 Arduino Issues
Connecting an Arduino to a car’s OBD2 port can sometimes present challenges. Ensure your OBD2 adapter is compatible with your vehicle and Arduino board. Double-check your wiring and code for any errors. Online forums and communities can be valuable resources for troubleshooting specific issues.
“Don’t be afraid to experiment and learn from your mistakes,” advises Michael Chen, Embedded Systems Developer. “The OBD2 Arduino community is very supportive, and you’ll find plenty of resources and guidance online.”
In conclusion, OBD2 Arduino offers an accessible and powerful way to explore the inner workings of your vehicle. From simple data monitoring to advanced diagnostics and custom applications, the possibilities are vast. So, grab your Arduino, an OBD2 adapter, and start unlocking the secrets of your car with OBD2 Arduino today.
FAQ
- What is OBD2? OBD2, or On-Board Diagnostics II, is a standardized system in vehicles that provides access to diagnostic data.
- What is Arduino? Arduino is an open-source microcontroller platform used for building electronics projects.
- What do I need for OBD2 Arduino projects? You need an Arduino board, an OBD2 adapter, and the necessary software.
- What can I do with OBD2 Arduino? You can monitor data, log information, create custom displays, and more.
- Where can I find more information? Online forums, communities, and websites like OBDFree offer extensive resources.
- Is it difficult to get started with OBD2 and Arduino? No, with the right resources and a little patience, it’s quite accessible.
- What are some common troubleshooting tips for OBD2 Arduino projects? Double check wiring, ensure compatibility, and consult online communities for support.
For further assistance, please contact us via WhatsApp: +1(641)206-8880, Email: [email protected] or visit us at 789 Elm Street, San Francisco, CA 94102, USA. We have a 24/7 customer support team ready to help.