Controlling your BMW E36’s auxiliary fan with a switch offers greater control over engine cooling, particularly beneficial in demanding driving situations or hot climates. This guide delves into the process of wiring an obd2 e36 aux fan on a switch, offering clear instructions and valuable insights for DIY enthusiasts and experienced mechanics alike.
Understanding the E36 Cooling System and the Role of the Auxiliary Fan
The E36’s cooling system is crucial for maintaining optimal engine temperature. The auxiliary fan plays a vital role, providing additional cooling when the engine is under heavy load or when ambient temperatures are high. Normally, the fan is controlled by the engine’s computer, activating based on coolant temperature and other factors. However, adding a manual switch allows you to override the automatic system and engage the fan whenever you deem necessary. This can be particularly helpful in preventing overheating during track days, stop-and-go traffic, or when diagnosing cooling system issues.
Why Install a Manual Switch for Your E36 Aux Fan?
There are several compelling reasons to consider installing a manual switch for your obd2 e36 aux fan:
- Preventative Maintenance: Proactively engaging the fan can help prevent overheating in demanding conditions.
- Troubleshooting: A switch allows you to test the fan’s functionality independently of the car’s computer.
- Increased Control: You gain complete control over the fan’s operation, ensuring optimal cooling when needed.
- Peace of Mind: Knowing you can manually cool your engine provides extra assurance, especially in extreme heat.
How to Wire Your E36 Aux Fan to a Switch: A Step-by-Step Guide
Before beginning, ensure you have the necessary tools and materials: a switch, wiring, wire connectors, electrical tape, and basic hand tools.
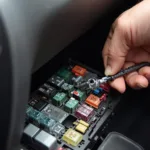
- Locate the Aux Fan Wiring: Identify the wires connected to the auxiliary fan. Typically, you’ll find a positive and a negative wire.
- Disconnect the Positive Wire: Carefully disconnect the positive wire from the fan.
- Connect the Switch: Run a wire from the positive terminal of the switch to the positive wire of the aux fan.
- Power the Switch: Run another wire from the other terminal of the switch to a 12V power source. This could be a fused connection directly to the battery or a switched 12V source.
- Ground the Fan: Ensure the negative wire of the aux fan is properly grounded.
- Test the Setup: Turn the ignition on and flip the switch. The fan should activate.
“A manual switch offers a simple yet effective way to manage your E36’s cooling system,” says Bob Smith, a seasoned BMW technician with over 20 years of experience. “It’s a relatively easy modification that can provide significant benefits in terms of performance and reliability.”
Choosing the Right Switch and Wiring
While the wiring process is straightforward, choosing the correct components is crucial. Select a switch rated for the amperage draw of the aux fan. Using undersized wiring or a switch can lead to overheating and potential fire hazards. Consult your car’s wiring diagram to determine the appropriate gauge wire for your application.
Conclusion: Taking Control of Your E36’s Cooling
Installing an obd2 e36 aux fan on a switch provides a valuable upgrade to your E36’s cooling system. By following this guide, you can enhance your car’s performance and reliability, particularly in demanding driving conditions. Remember to use high-quality components and follow proper wiring procedures for optimal results and safety.
FAQ
- Can I damage my car by installing a switch? Improper installation can potentially damage your electrical system. Follow the instructions carefully and consult a professional if needed.
- What type of switch should I use? Use a switch rated for the amperage of the fan.
- Where should I mount the switch? Choose a location that is easily accessible and doesn’t interfere with other controls.
- Do I need any special tools? Basic hand tools and wire connectors are usually sufficient.
- What gauge wire should I use? Consult your car’s wiring diagram for the correct gauge.
- Is this modification reversible? Yes, you can easily revert to the original configuration.
- Will this affect my car’s warranty? Modifications might void certain aspects of your warranty. Consult your warranty documentation.
Need help with your car diagnostics? Contact us via WhatsApp: +1(641)206-8880, Email: [email protected] or visit us at 789 Elm Street, San Francisco, CA 94102, USA. We have a 24/7 customer support team.