OBD2 male crimp connectors are essential components in the world of automotive diagnostics. These small but mighty connectors bridge the gap between your OBD2 scanner and your vehicle’s diagnostic port, enabling seamless communication and accurate data retrieval.
Understanding OBD2 Male Crimp Connectors
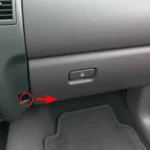
OBD2 male crimp connectors are specifically designed to mate with the female receptacle of the OBD2 port, typically found under the dashboard on the driver’s side. They consist of a metal terminal, which carries the electrical signal, and a plastic housing that provides insulation and ensures a secure connection.
Choosing the Right OBD2 Male Crimp Connector
Selecting the correct OBD2 male crimp connector is crucial for a reliable and long-lasting connection. Here are key factors to consider:
- Pin Configuration: OBD2 connectors have a standardized 16-pin configuration, but not all pins are used in every application. Ensure the connector you choose aligns with the specific pinout required for your diagnostic needs.
- Wire Gauge Compatibility: Connectors are designed to accommodate specific wire gauges. Using an incompatible wire gauge can result in a loose connection, poor signal transmission, or even damage to the connector.
- Material Quality: Opt for connectors made from high-quality materials such as gold-plated terminals for superior conductivity and corrosion resistance. Durable plastic housings provide protection against impact and environmental factors.
Crimping OBD2 Male Connectors: A Step-by-Step Guide
Proper crimping technique is essential for a secure and reliable connection. Follow these steps for optimal results:
- Strip the Wire: Using wire strippers, carefully remove approximately ¼ inch of insulation from the end of the wire, exposing the bare conductor.
- Insert the Wire: Insert the stripped wire into the metal terminal of the connector, ensuring it reaches the bottom of the terminal.
- Crimp the Terminal: Using a crimping tool specifically designed for OBD2 connectors, apply pressure to the terminal, compressing it around the wire to create a secure connection.
- Inspect the Crimp: Visually inspect the crimp to ensure the wire is fully seated within the terminal and the crimp is tight and uniform.
- Insert the Terminal into the Housing: Carefully align the crimped terminal with the corresponding slot in the plastic housing and push it in until it locks into place.
Troubleshooting OBD2 Male Crimp Connector Issues
Experiencing connectivity problems with your OBD2 scanner? Here are common issues and troubleshooting tips:
- Loose Connection: Check for loose terminals within the connector housing. If a terminal is loose, re-crimp it following the steps outlined above.
- Bent or Damaged Pins: Inspect the pins for any signs of bending or damage. If a pin is damaged, the connector will need to be replaced.
- Corrosion: Over time, terminals can corrode, hindering conductivity. Cleaning the terminals with electrical contact cleaner can often resolve this issue.
Conclusion
OBD2 male crimp connectors play a vital role in ensuring accurate and reliable vehicle diagnostics. By understanding the different types of connectors, proper crimping techniques, and common troubleshooting tips, you can confidently establish a secure connection and unlock the full potential of your OBD2 scanner. For any assistance with your OBD2 needs, don’t hesitate to contact us via WhatsApp at +1(641)206-8880 or email us at [email protected]. Our dedicated customer support team is available 24/7 to assist you.


