OBD2 pin removal can seem daunting, but with the right tools and knowledge, it becomes a straightforward process. This guide will walk you through everything you need to know, from identifying the correct pins to safely removing and replacing them. We’ll explore the reasons behind OBD2 pin removal, the necessary precautions, and the tools that make the job easier.
Knowing how to work with your vehicle’s OBD2 port is essential for any car enthusiast or professional mechanic. Whether you’re troubleshooting a problem, installing a new device, or customizing your car’s electronics, understanding OBD2 pin removal is a valuable skill. Let’s dive into the specifics.
Understanding the OBD2 Port and Its Pins
The OBD2 port, typically located under the driver’s side dashboard, is a gateway to your vehicle’s diagnostic system. Each of the sixteen pins in the standard OBD2 connector has a specific function, ranging from power supply to data transmission. Identifying the correct pin for removal is crucial, as an incorrect removal can damage the port or the connected device.
Before attempting any OBD2 pin removal, consult your vehicle’s wiring diagram to confirm the pin’s function. This information is vital to prevent accidental disruption of critical systems. You can often find these diagrams in your vehicle’s service manual or online resources. For those looking to modify their OBD2 setup, 300zx obd2 conversion might offer some helpful insights.
Why Remove OBD2 Pins?
There are several reasons why you might need to remove OBD2 pins. Troubleshooting a faulty connection, repairing a damaged wire, installing custom wiring for aftermarket devices, or even simply replacing a broken pin are all common scenarios. Understanding the specific reason for your pin removal will help you choose the right tools and approach. Sometimes, specialized tools like a pin head removal tool obd2 can be indispensable.
Common Reasons for OBD2 Pin Removal
- Repairing Damaged Wires: Frayed or broken wires within the OBD2 connector can disrupt communication and require pin removal for replacement.
- Installing Aftermarket Devices: Adding accessories like gauges or performance monitors often necessitates custom wiring involving OBD2 pin manipulation.
- Troubleshooting Connection Issues: If you’re experiencing problems with your OBD2 scanner or other diagnostic tools, a loose or damaged pin might be the culprit.
Tools for OBD2 Pin Removal
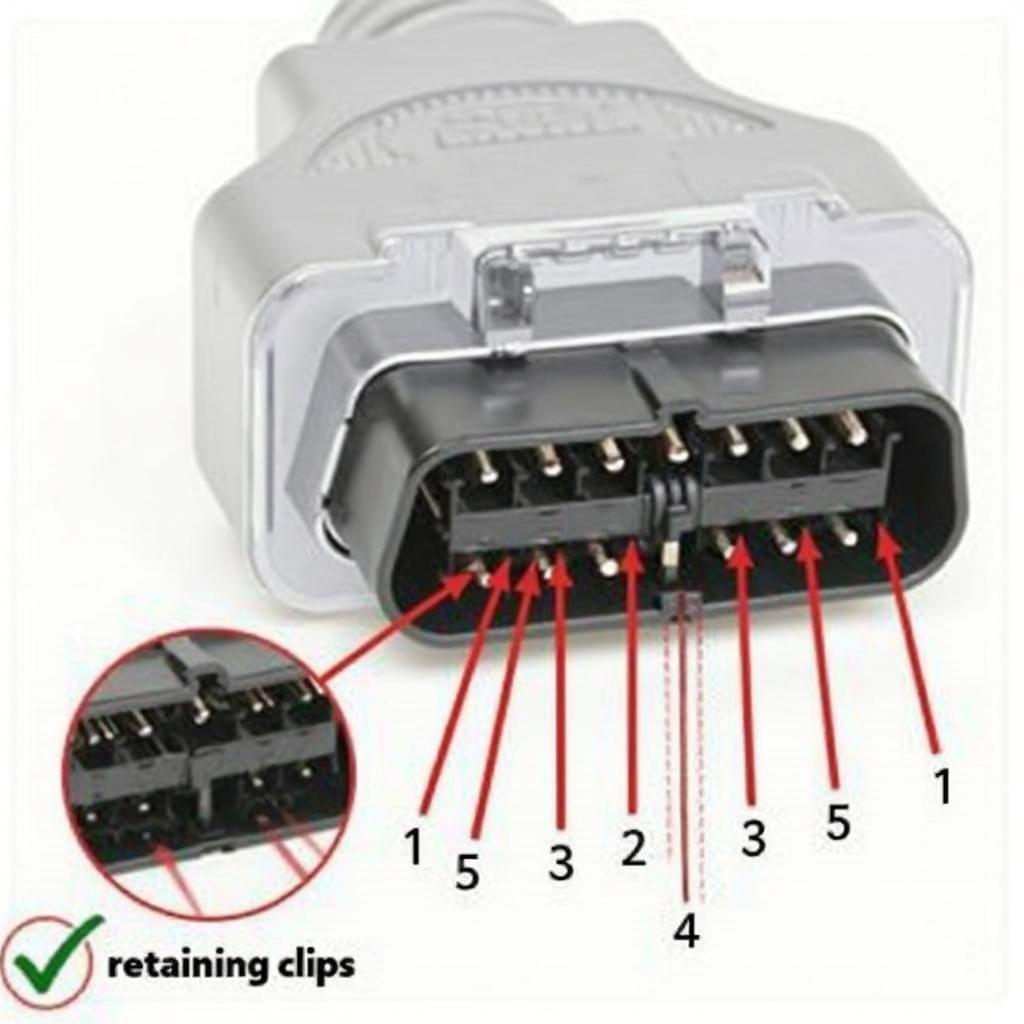
Using the correct tools is essential for successful and damage-free OBD2 pin removal. While a small flathead screwdriver can sometimes suffice, specialized obd2 pin removal tool are designed specifically for this purpose and minimize the risk of damaging the delicate pins and connector housing. These tools typically feature small hooks or picks that engage the retaining clips holding the pins in place.
“Using the right tool makes all the difference. A specialized pin removal tool is a small investment that can prevent costly repairs down the line.” – John Davis, Automotive Electronics Specialist
How to Remove OBD2 Pins Safely
The process of removing an OBD2 pin involves carefully releasing the retaining clip that secures the pin within the connector. This usually requires inserting the pin removal tool into a small slot or hole next to the pin and gently lifting the clip. Once the clip is released, the pin can be carefully pulled out from the back of the connector. If you are dealing with a different vehicle model, you might find this resource on como cambiar elconector del obd2 de una dodge ram useful.
Step-by-Step OBD2 Pin Removal Guide
- Disconnect the Battery: This crucial step prevents short circuits and protects your vehicle’s electrical system.
- Locate the Retaining Clip: Identify the small clip holding the target pin in place.
- Insert the Removal Tool: Carefully insert the tool into the designated slot.
- Release the Clip: Gently lift the retaining clip.
- Remove the Pin: Pull the pin straight out from the back of the connector.
Conclusion
OBD2 pin removal is a valuable skill for anyone working with vehicle electronics. By following this guide, using the correct tools, and taking the necessary precautions, you can confidently and safely remove OBD2 pins without damaging your vehicle’s diagnostic system. Remember to always consult your vehicle’s wiring diagram before attempting any pin removal to ensure you’re working with the correct pin. Understanding obd2 pin removal empowers you to troubleshoot issues, install aftermarket devices, and maintain your vehicle’s electrical system effectively.
FAQ
-
What is the purpose of the OBD2 port? The OBD2 port provides access to your vehicle’s diagnostic system for troubleshooting and monitoring.
-
Do I need special tools for OBD2 pin removal? While a small flathead screwdriver can sometimes work, dedicated pin removal tools are recommended for safer and easier removal.
-
Where can I find my vehicle’s wiring diagram? Your vehicle’s service manual or online resources are good places to find wiring diagrams.
-
Is it safe to remove OBD2 pins myself? Yes, as long as you follow the proper procedures and precautions outlined in this guide.
-
What should I do if I damage an OBD2 pin? If you damage a pin, it’s best to consult a qualified automotive electrician for repair.
-
Can I add new pins to my OBD2 port? Adding pins is possible but requires advanced knowledge and should be done by a professional.
-
Are all OBD2 ports the same? While the general layout is standardized, there can be variations in pin assignments between different vehicle makes and models.
Need More Help?
For further assistance with OBD2 pin removal or any other car diagnostic related questions, contact us via WhatsApp: +1(641)206-8880, Email: [email protected] or visit our office at 789 Elm Street, San Francisco, CA 94102, USA. Our 24/7 customer support team is ready to help. You might also find helpful information on carb swap pass obd2.


