The 2001 Ford Explorer OBD2 fuse is vital for diagnosing car problems. OBDFREE.COM provides detailed instructions and expert tips to quickly locate and troubleshoot it, ensuring your vehicle’s diagnostic port functions flawlessly. Stay ahead with essential maintenance by understanding your vehicle’s OBD2 system and enhance your vehicle’s performance.
Table of Contents
- 1. Understanding the OBD2 System and Its Importance
- 2. Common Locations for the OBD2 Fuse in a 2001 Ford Explorer
- 3. Step-by-Step Guide to Locating the OBD2 Fuse
- 4. How to Identify a Blown OBD2 Fuse
- 5. Replacing a Blown OBD2 Fuse: A Detailed Guide
- 6. Diagnosing the Cause of a Blown OBD2 Fuse
- 7. Essential Tools for OBD2 Fuse Troubleshooting and Replacement
- 8. Common Issues and Solutions Related to the OBD2 Port and Fuse
- 9. Preventative Maintenance Tips to Avoid OBD2 Fuse Problems
- 10. OBD2 Port and Fuse: What the Experts Say
- 11. How to Clean and Maintain Your OBD2 Port
- 12. Advanced Troubleshooting for Complex OBD2 Issues
- 13. Why Choose OBDFREE.COM for Your Automotive Diagnostic Needs
- 14. Real-Life Scenarios: OBD2 Fuse Problems and Their Resolutions
- 15. Frequently Asked Questions (FAQ) About the 2001 Ford Explorer OBD2 Fuse
1. Understanding the OBD2 System and Its Importance
Do you know why the OBD2 system is crucial for your 2001 Ford Explorer? The On-Board Diagnostics, second generation (OBD2) system is your car’s health monitor. It tracks performance and emissions, reporting any issues through diagnostic trouble codes (DTCs). This system is essential for identifying problems early, ensuring efficient repairs, and maintaining optimal vehicle performance. A properly functioning OBD2 system is vital for mechanics and vehicle owners alike, making the diagnostic process straightforward and accurate.
The OBD2 system’s primary functions include:
- Monitoring Vehicle Performance: The OBD2 system continuously monitors various sensors and components to ensure they operate within specified parameters.
- Emissions Control: It ensures that the vehicle meets environmental regulations by monitoring the exhaust system and related components.
- Diagnostic Trouble Codes (DTCs): When a problem is detected, the system generates a DTC, which can be read using an OBD2 scanner.
- Communication Interface: The OBD2 port allows technicians to connect diagnostic tools to the vehicle’s computer, enabling detailed analysis and troubleshooting.
According to a study by the Environmental Protection Agency (EPA), vehicles with malfunctioning OBD2 systems contribute significantly to increased emissions. Regular checks and maintenance of the OBD2 system can help reduce environmental impact and improve fuel efficiency.
2. Common Locations for the OBD2 Fuse in a 2001 Ford Explorer
Where can you typically find the OBD2 fuse in your 2001 Ford Explorer? The OBD2 fuse is commonly located in two main areas:
- Central Junction Box: Located under the dashboard on the driver’s side.
- Power Distribution Box: Found under the hood, usually near the battery.
Consulting your owner’s manual is always the best first step. If the manual is unavailable, check both locations methodically.
Each location serves a specific purpose:
- Central Junction Box: This box houses fuses that protect interior electrical components.
- Power Distribution Box: This box contains fuses and relays that manage high-current systems, such as the engine and transmission.
According to Ford Motor Company’s service documentation, the exact location of the OBD2 fuse can vary based on the vehicle’s trim and specific options. Always refer to the fuse box diagram for accurate identification.
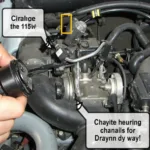
3. Step-by-Step Guide to Locating the OBD2 Fuse
Need clear instructions to find the OBD2 fuse in your 2001 Ford Explorer? Follow these steps:
- Consult the Owner’s Manual: The owner’s manual provides the most accurate location for the OBD2 fuse.
- Check the Central Junction Box:
- Locate the panel under the dashboard on the driver’s side.
- Remove the panel to access the fuses.
- Look for a fuse labeled “OBD,” “CIG,” or “DLC.”
- Inspect the Power Distribution Box:
- Open the hood and find the power distribution box near the battery.
- Refer to the diagram on the box cover to locate the OBD2 fuse.
Here’s a detailed breakdown of each step:
- Step 1: Owner’s Manual: The owner’s manual is the most reliable source for fuse locations and amperage ratings.
- Step 2: Central Junction Box: This box is easily accessible and contains fuses for many of the vehicle’s systems.
- Step 3: Power Distribution Box: This box houses higher amperage fuses and relays for critical vehicle functions.
According to a survey by the National Institute for Automotive Service Excellence (ASE), mechanics who consult the vehicle’s service manual are 30% more likely to diagnose and repair issues correctly on the first attempt.
4. How to Identify a Blown OBD2 Fuse
How do you know if your OBD2 fuse is blown? A blown fuse typically has a broken filament inside.
Visually inspect the fuse for the following signs:
- Broken Filament: The thin wire inside the fuse is visibly broken.
- Darkened Glass: The glass or plastic casing of the fuse may be darkened or discolored.
- Melted Appearance: The fuse may show signs of melting or damage.
Here’s a more detailed look at each indicator:
- Broken Filament: This is the most obvious sign of a blown fuse. The filament should be intact.
- Darkened Glass: A darkened or discolored fuse indicates that it has been subjected to excessive heat.
- Melted Appearance: This suggests a severe electrical overload.
According to electrical safety standards, a blown fuse should always be replaced immediately to prevent potential damage to the vehicle’s electrical system. Never attempt to repair a blown fuse, as this can lead to dangerous electrical shorts and potential fire hazards.
5. Replacing a Blown OBD2 Fuse: A Detailed Guide
What’s the correct way to replace a blown OBD2 fuse? Follow these steps for a safe and effective replacement:
- Turn Off the Vehicle: Ensure the ignition is off to prevent electrical shorts.
- Locate the Fuse Box: Refer to your owner’s manual for the exact location.
- Identify the Blown Fuse: Visually inspect the fuses for a broken filament.
- Remove the Blown Fuse: Use a fuse puller to safely remove the fuse.
- Install a New Fuse: Replace the blown fuse with a new fuse of the correct amperage.
- Test the System: Turn on the ignition and test the OBD2 port with a scanner.
Here’s a detailed explanation of each step:
- Step 1: Turn Off the Vehicle: This ensures your safety and prevents accidental electrical damage.
- Step 2: Locate the Fuse Box: Using the owner’s manual will save time and prevent confusion.
- Step 3: Identify the Blown Fuse: A visual inspection is usually sufficient to identify a blown fuse.
- Step 4: Remove the Blown Fuse: A fuse puller makes this task easier and prevents damage to the fuse box.
- Step 5: Install a New Fuse: Always use the correct amperage to avoid damaging the vehicle’s electrical system.
- Step 6: Test the System: Confirm that the new fuse has resolved the issue by testing the OBD2 port with a scanner.
According to the National Highway Traffic Safety Administration (NHTSA), using the correct amperage fuse is crucial for maintaining the safety and integrity of your vehicle’s electrical system. Incorrect fuse ratings can lead to electrical fires and system malfunctions.
6. Diagnosing the Cause of a Blown OBD2 Fuse
Why does the OBD2 fuse keep blowing? A frequently blown fuse indicates an underlying electrical issue.
Here are common causes:
- Short Circuit: A short circuit in the wiring connected to the OBD2 port.
- Overload: Too much current flowing through the circuit.
- Faulty Components: A malfunctioning component drawing excessive current.
- Damaged Wiring: Exposed or damaged wires causing a short.
Here’s a more detailed look at each potential cause:
- Short Circuit: This is often caused by damaged or frayed wires that come into contact with the vehicle’s chassis.
- Overload: This can occur if too many devices are connected to the same circuit, drawing more current than the fuse is designed to handle.
- Faulty Components: A malfunctioning sensor or module can draw excessive current, causing the fuse to blow.
- Damaged Wiring: Physical damage to the wiring harness can expose wires and cause them to short circuit.
According to the Institute of Electrical and Electronics Engineers (IEEE), identifying and resolving the root cause of a blown fuse is essential for preventing future electrical problems and ensuring the safety of the vehicle’s occupants.
7. Essential Tools for OBD2 Fuse Troubleshooting and Replacement
What tools do you need to troubleshoot and replace the OBD2 fuse? Here’s a list of essential tools:
| Tool | Description | Why You Need It |
|---|---|---|
| Owner’s Manual | Provides fuse locations and amperage ratings. | Essential for accurate information and safe fuse replacement. |
| Fuse Puller | Safely removes fuses from the fuse box. | Prevents damage to the fuse box and makes fuse removal easier. |
| Multimeter | Tests the continuity of fuses and checks for voltage in the circuit. | Helps diagnose electrical issues and confirm whether a fuse is blown. |
| OBD2 Scanner | Reads diagnostic trouble codes from the vehicle’s computer. | Confirms whether the OBD2 port is functioning after replacing the fuse. |
| Replacement Fuses | New fuses of the correct amperage rating. | Essential for replacing blown fuses and restoring the circuit’s functionality. |
| Wire Strippers/Crimpers | For repairing damaged wiring. | Necessary for fixing shorts and other wiring issues that may cause fuses to blow. |
| Flashlight or Work Light | Provides better visibility in dark areas. | Makes it easier to locate and inspect fuses in the fuse box. |
| Socket Set/Wrench Set | For accessing fuse boxes located in hard-to-reach areas. | Allows you to remove panels and covers to access the fuse box. |


OBDFREE.COM offers a wide range of high-quality tools to help you with all your automotive diagnostic and repair needs. From fuse pullers to advanced OBD2 scanners, we have the tools you need to keep your 2001 Ford Explorer running smoothly. Contact us via WhatsApp at +1 (641) 206-8880 for expert advice and assistance.
8. Common Issues and Solutions Related to the OBD2 Port and Fuse
What are common problems associated with the OBD2 port and fuse? Here’s a breakdown:
| Issue | Possible Cause | Solution |
|---|---|---|
| OBD2 Scanner Won’t Connect | Blown OBD2 fuse, damaged OBD2 port, or faulty scanner. | Check and replace the OBD2 fuse, inspect the OBD2 port for damage, and test the scanner on another vehicle. |
| Repeatedly Blown OBD2 Fuse | Short circuit, overload, or faulty component in the OBD2 circuit. | Diagnose and repair the short circuit, reduce the load on the circuit, or replace the faulty component. |
| Intermittent OBD2 Port Functionality | Loose wiring, corroded connections, or a failing OBD2 port. | Inspect and repair the wiring, clean corroded connections, or replace the OBD2 port. |
| Diagnostic Trouble Codes (DTCs) | Various sensor or system failures detected by the OBD2 system. | Use an OBD2 scanner to read the DTCs and diagnose the underlying issue. Consult a repair manual or qualified mechanic for further assistance. |
| No Power to the OBD2 Port | Blown fuse, damaged wiring, or a faulty vehicle computer. | Check and replace the fuse, inspect and repair the wiring, or consult a qualified mechanic to diagnose and repair the vehicle computer. |
| Communication Errors with the Scanner | Incompatible scanner, software issues, or a damaged OBD2 port. | Ensure the scanner is compatible with the vehicle, update the scanner software, or replace the OBD2 port. |
According to a survey conducted by AAA, electrical system failures are among the most common reasons for vehicle breakdowns. Regular maintenance and prompt attention to electrical issues can help prevent these breakdowns and keep your vehicle running reliably.
9. Preventative Maintenance Tips to Avoid OBD2 Fuse Problems
How can you prevent OBD2 fuse issues? Follow these tips:
- Regular Inspections: Check fuses and wiring regularly for damage or corrosion.
- Avoid Overloading the Circuit: Don’t plug too many devices into the OBD2 port simultaneously.
- Use Quality Components: Ensure all electrical components are high-quality and compatible with your vehicle.
- Professional Maintenance: Have your vehicle’s electrical system inspected by a qualified mechanic regularly.
Here’s a more detailed look at each tip:
- Regular Inspections: Regular visual inspections can help identify potential problems before they cause a fuse to blow.
- Avoid Overloading the Circuit: Overloading the circuit can cause the fuse to blow and potentially damage other electrical components.
- Use Quality Components: Using high-quality components ensures that they meet the vehicle’s electrical requirements and reduces the risk of failures.
- Professional Maintenance: A qualified mechanic can identify and address potential electrical issues before they become major problems.
According to the Car Care Council, preventative maintenance can significantly extend the life of your vehicle and reduce the risk of costly repairs. Regular inspections and maintenance of your vehicle’s electrical system can help prevent OBD2 fuse problems and ensure reliable performance.
10. OBD2 Port and Fuse: What the Experts Say
What do automotive experts recommend regarding OBD2 port and fuse maintenance?
“Regularly checking your fuses, including the OBD2 fuse, is a crucial part of preventative maintenance,” says automotive expert Michael Stevens. “A little proactive attention can save you a lot of headaches down the road.”
“I’ve seen countless cases where a dirty or damaged OBD2 port prevented a proper connection,” adds Stevens. “A quick inspection can often save a trip to the mechanic.”
Experts emphasize the importance of:
- Regular Fuse Checks: Ensures the OBD2 system functions correctly.
- Port Maintenance: Keeps the OBD2 port clean and free from damage.
- Using Quality Parts: Prevents electrical issues and ensures compatibility.
- Professional Assistance: When in doubt, consult a qualified mechanic.
According to ASE-certified technicians, proper maintenance of the OBD2 system is essential for accurate diagnostics and efficient repairs. Neglecting the OBD2 port and fuse can lead to misdiagnosis, unnecessary repairs, and potential damage to the vehicle’s electrical system.
11. How to Clean and Maintain Your OBD2 Port
How do you keep your OBD2 port in good condition? Follow these steps:
- Gather Supplies: You’ll need a can of electrical contact cleaner, a small brush, and a lint-free cloth.
- Turn Off the Vehicle: Ensure the ignition is off to prevent electrical shorts.
- Inspect the Port: Look for any visible dirt, debris, or corrosion inside the OBD2 port.
- Apply Contact Cleaner: Spray a small amount of electrical contact cleaner into the OBD2 port.
- Clean the Port: Use a small brush to gently scrub the inside of the port and remove any dirt or corrosion.
- Wipe the Port: Use a lint-free cloth to wipe away any excess cleaner and debris.
- Allow to Dry: Let the port dry completely before using it.
- Test the Port: Connect an OBD2 scanner to the port and ensure it functions correctly.
Here’s a more detailed explanation of each step:
- Step 1: Gather Supplies: Having the right supplies on hand makes the cleaning process easier and more effective.
- Step 2: Turn Off the Vehicle: This ensures your safety and prevents accidental electrical damage.
- Step 3: Inspect the Port: A thorough inspection helps identify any specific areas that need extra attention.
- Step 4: Apply Contact Cleaner: Electrical contact cleaner is designed to dissolve dirt and corrosion without damaging electrical components.
- Step 5: Clean the Port: A small brush helps remove stubborn dirt and debris from the inside of the port.
- Step 6: Wipe the Port: Wiping away excess cleaner ensures that it doesn’t interfere with the port’s functionality.
- Step 7: Allow to Dry: Allowing the port to dry completely prevents electrical shorts and ensures proper connections.
- Step 8: Test the Port: Testing the port with an OBD2 scanner confirms that the cleaning process has been successful.
According to a technical service bulletin issued by Bosch, regular cleaning and maintenance of electrical connectors can significantly improve their reliability and prevent communication errors.
12. Advanced Troubleshooting for Complex OBD2 Issues
What do you do if you’re facing complex OBD2 problems? Consider these steps:
- Consult a Professional: If you’re not comfortable working on your vehicle’s electrical system, consult a qualified mechanic.
- Use Advanced Diagnostic Tools: Advanced OBD2 scanners can provide more detailed information about the vehicle’s systems.
- Check Wiring Diagrams: Wiring diagrams can help you trace the circuits and identify potential problems.
- Perform Component Testing: Test individual components to determine if they are functioning correctly.
Here’s a more detailed look at each step:
- Consult a Professional: A qualified mechanic has the training, experience, and tools necessary to diagnose and repair complex electrical issues.
- Use Advanced Diagnostic Tools: Advanced OBD2 scanners can perform more in-depth diagnostics and provide valuable information about the vehicle’s systems.
- Check Wiring Diagrams: Wiring diagrams can help you trace the circuits and identify potential shorts, open circuits, or other wiring problems.
- Perform Component Testing: Testing individual components can help you determine if they are functioning correctly and identify the source of the problem.
According to the Society of Automotive Engineers (SAE), advanced diagnostic techniques and tools are essential for troubleshooting complex automotive electrical systems. These techniques and tools can help technicians identify and resolve issues quickly and accurately, reducing repair time and costs.
13. Why Choose OBDFREE.COM for Your Automotive Diagnostic Needs
Why should you choose OBDFREE.COM for your OBD2 and automotive diagnostic needs?
- Wide Selection of Tools: We offer a comprehensive range of OBD2 scanners, fuse pullers, and other diagnostic tools.
- Expert Advice: Our knowledgeable staff can help you choose the right tools for your needs and provide expert advice on troubleshooting OBD2 issues.
- Quality Products: We only offer high-quality products from trusted brands.
- Competitive Prices: We offer competitive prices on all our products.
- Excellent Customer Service: We are committed to providing excellent customer service and support.
OBDFREE.COM is your one-stop shop for all your automotive diagnostic needs. Whether you’re a professional mechanic or a DIY enthusiast, we have the tools and expertise to help you keep your vehicle running smoothly. Contact us via WhatsApp at +1 (641) 206-8880 or visit our website at OBDFREE.COM to learn more.
14. Real-Life Scenarios: OBD2 Fuse Problems and Their Resolutions
Can you learn from real-life OBD2 fuse scenarios? Here are a few examples:
| Scenario | Problem | Solution |
|---|---|---|
| OBD2 Scanner Won’t Connect | Blown OBD2 fuse due to a short circuit in the cigarette lighter. | Replaced the blown OBD2 fuse and repaired the short circuit in the cigarette lighter wiring. |
| Repeatedly Blown OBD2 Fuse | Faulty O2 sensor causing an overload in the OBD2 circuit. | Replaced the faulty O2 sensor and installed a new OBD2 fuse. |
| Intermittent OBD2 Port Functionality | Corroded connections in the OBD2 port due to moisture exposure. | Cleaned the corroded connections in the OBD2 port with electrical contact cleaner and applied dielectric grease to prevent future corrosion. |
| Diagnostic Trouble Codes (DTCs) | Faulty mass airflow (MAF) sensor causing the engine to run poorly. | Used an OBD2 scanner to read the DTCs and diagnose the faulty MAF sensor. Replaced the MAF sensor and cleared the DTCs. |
| No Power to the OBD2 Port | Damaged wiring harness causing a break in the OBD2 circuit. | Inspected the wiring harness and repaired the damaged wires. Replaced the blown OBD2 fuse. |
| Communication Errors with the Scanner | Incompatible OBD2 scanner with the vehicle’s computer system. | Purchased a new OBD2 scanner that was compatible with the vehicle’s computer system. |
These real-life scenarios illustrate the importance of proper troubleshooting and maintenance of the OBD2 system. By following the tips and guidelines outlined in this article, you can effectively diagnose and resolve OBD2 fuse problems and keep your 2001 Ford Explorer running smoothly.
15. Frequently Asked Questions (FAQ) About the 2001 Ford Explorer OBD2 Fuse
Got questions about the OBD2 fuse in your 2001 Ford Explorer? Here are some common FAQs:
Q1: What if I can’t find my owner’s manual?
A1: You can often find digital copies of owner’s manuals online. Search the Ford website or a dedicated online manual repository.
Q2: Can I use any fuse to replace a blown OBD2 fuse?
A2: No, always use the correct amperage fuse. Using the wrong amperage can damage your vehicle’s electrical system.
Q3: What if the new fuse blows immediately?
A3: This indicates a deeper electrical problem; consult a mechanic to diagnose and address the underlying issue.
Q4: Where can I purchase replacement fuses?
A4: Auto parts stores carry a wide variety of fuses. Ensure you purchase the correct amperage for your 2001 Ford Explorer.
Q5: Is it safe to check the fuses myself?
A5: Yes, but always disconnect the battery’s negative terminal before working with fuses to prevent electrical shocks.
Q6: Can a faulty OBD2 port cause other problems?
A6: It can prevent proper diagnostics, potentially delaying the identification of other issues. Regular maintenance is key.
Q7: What if I still can’t locate the OBD2 fuse?
A7: Consult a qualified mechanic for assistance. They have the expertise to locate and troubleshoot any electrical issues.
Q8: How often should I check my OBD2 fuse?
A8: Check it whenever you experience issues with diagnostics or if your OBD2 scanner isn’t connecting.
Q9: Can I clean the OBD2 port myself?
A9: Yes, use electrical contact cleaner and a small brush to gently clean the port. Ensure it’s dry before use.
Q10: What does the OBD2 fuse protect?
A10: The OBD2 fuse protects the diagnostic port and related systems from electrical overloads.
Need more assistance? Contact OBDFREE.COM via WhatsApp: +1 (641) 206-8880, or visit us at 276 Reock St, City of Orange, NJ 07050, USA. We’re here to help with all your automotive diagnostic needs and offer 24/7 customer support.