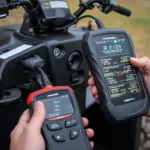
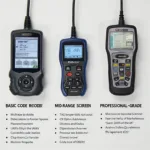
Setting up your WiFi OBD2 scanner with DHCP can seem daunting, but with a little guidance, it’s a breeze. This comprehensive guide will walk you through the process, ensuring a smooth and effortless connection to your vehicle’s diagnostic port. We’ll cover everything from understanding DHCP to troubleshooting common connection issues.
Understanding DHCP and its Role in WiFi OBD2 Setup
DHCP (Dynamic Host Configuration Protocol) is the unsung hero of network connectivity. It automatically assigns IP addresses and other network parameters to devices, eliminating the need for manual configuration. This is crucial for your WiFi OBD2 scanner, allowing it to seamlessly connect to your smartphone or tablet without any complex setup. Imagine plugging in your scanner and having it instantly connect – that’s the power of DHCP.
Step-by-Step Guide to Setting Up WiFi OBD2 with DHCP
- Power up your OBD2 adapter: Plug the adapter into your vehicle’s OBD2 port. The adapter’s LED should light up, indicating power.
- Connect to the adapter’s WiFi network: On your smartphone or tablet, navigate to the WiFi settings and select the network broadcasted by your OBD2 adapter. The network name (SSID) is usually printed on the adapter or in its manual.
- Confirm DHCP is enabled: Most OBD2 adapters have DHCP enabled by default. However, it’s a good practice to double-check. Refer to your adapter’s manual for instructions on how to access its configuration settings. Look for a section on network settings and ensure DHCP is enabled.
- Launch your OBD2 software: Open your preferred OBD2 software app on your smartphone or tablet. The app should automatically detect the connected adapter and establish communication.
- Start diagnosing: Once the connection is established, you’re ready to start diagnosing your vehicle. Access various parameters, read and clear trouble codes, and monitor your engine’s performance in real-time.
Troubleshooting Common DHCP Issues with WiFi OBD2
Sometimes, even with DHCP enabled, you might encounter connection problems. Here are a few common issues and their solutions:
- No connection: Ensure the adapter is properly plugged in and receiving power. Check your smartphone’s WiFi settings to confirm it’s connected to the correct network. Restart both the adapter and your smartphone.
- Intermittent connection: Move your smartphone closer to the adapter to improve signal strength. Interference from other electronic devices can also cause intermittent connections. Try turning off nearby devices or moving to a different location.
- Incorrect IP address: In rare cases, your device might receive an incorrect IP address from the DHCP server. Try resetting the adapter to its factory default settings and reconnecting.
Advanced DHCP Settings for WiFi OBD2 (For Experienced Users)
For users comfortable with network configurations, some advanced DHCP settings can be adjusted to optimize the connection. These settings typically involve configuring a static IP address within the DHCP range assigned by the adapter. However, proceed with caution, as incorrect configurations can lead to connectivity issues. Consult your adapter’s manual for detailed instructions on accessing and modifying these settings.
“Understanding the nuances of DHCP is crucial for a seamless WiFi OBD2 experience,” says John Miller, Senior Automotive Diagnostic Technician at Miller’s Auto Repair. “While most users can rely on the default settings, knowing how to troubleshoot and optimize DHCP can be invaluable for advanced users.”
Conclusion
Setting up your WiFi OBD2 scanner with DHCP is straightforward and offers a plug-and-play diagnostic experience. By following the steps outlined in this guide and understanding the basics of DHCP, you can quickly connect your scanner and unlock the power of real-time vehicle diagnostics. Remember to consult your adapter’s manual for specific instructions and advanced configuration options. Setting up wifi obd2 setup dhcp correctly will enhance your diagnostic capabilities.
For further assistance, please contact us via WhatsApp: +1(641)206-8880, Email: [email protected] or visit us at 789 Elm Street, San Francisco, CA 94102, USA. Our 24/7 customer support team is always ready to help.

