Ensuring your car’s OBD2 connector is in good working order is essential for accurate diagnostics and troubleshooting. This comprehensive guide will delve into the importance of testing your OBD2 connector and provide clear instructions on how to do it yourself.
What is an OBD2 Connector and Why Should You Test It?
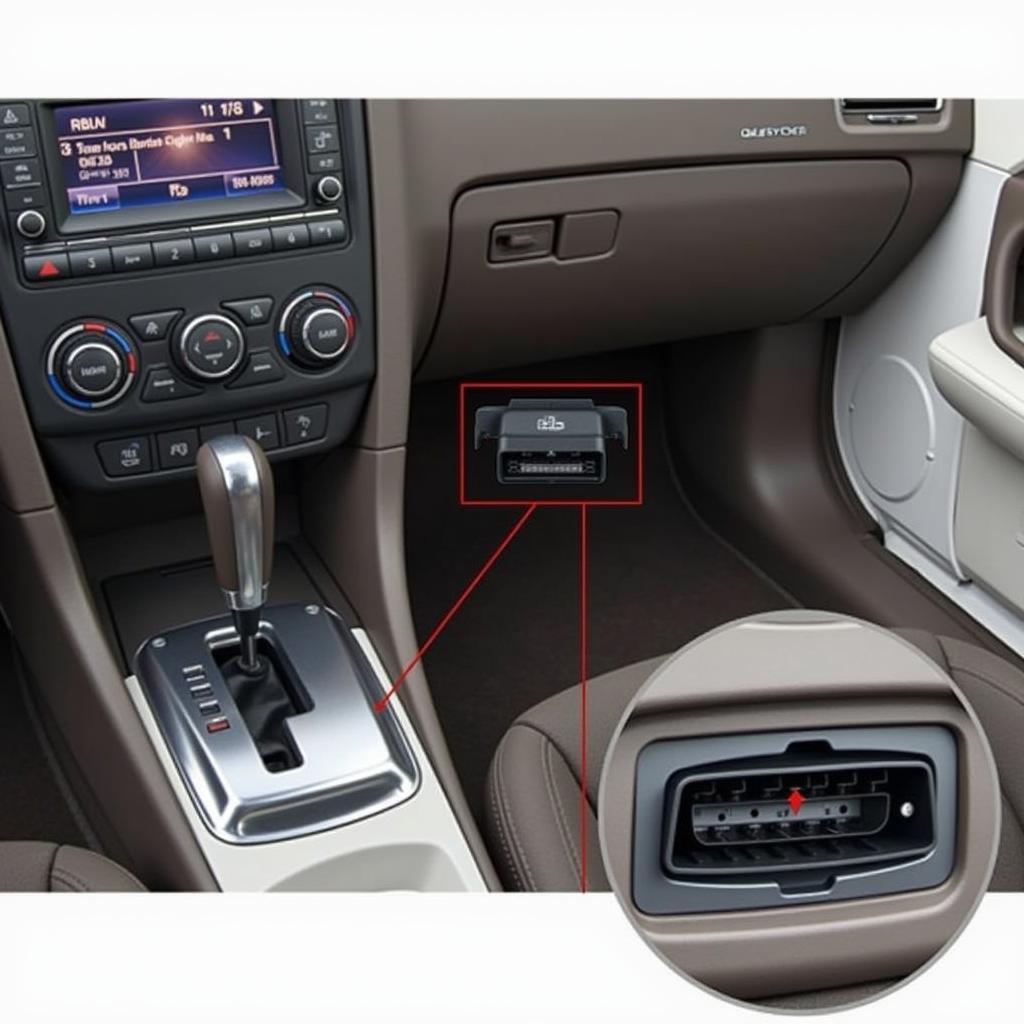
The OBD2 connector, often located under the driver’s side dashboard, is the gateway to your car’s onboard computer. It allows communication between your vehicle and diagnostic tools, like OBD2 scanners, to retrieve information about your engine, transmission, emissions, and more.
Testing your OBD2 connector is crucial for several reasons:
- Accurate Diagnostics: A faulty connector can lead to miscommunication, resulting in inaccurate fault codes or incomplete data, making it difficult to diagnose car problems accurately.
- Cost-Effective Repairs: By identifying a connector issue early on, you can avoid unnecessary repairs stemming from misdiagnosed problems.
- DIY Empowerment: Testing the connector is a simple process that empowers car owners to take control of their vehicle’s maintenance.
 OBD2 Connector Location
Common OBD2 Connector Problems
Before you start testing, familiarize yourself with common issues:
- Bent or Damaged Pins: Physical damage can disrupt the connection between the scanner and your vehicle’s computer.
- Loose Connection: A loose connection can lead to intermittent communication failures.
- Corrosion: Exposure to moisture or humidity can cause corrosion on the pins, hindering proper signal transmission.
- Wiring Issues: Damaged or faulty wiring within the connector can disrupt communication.
How to Test Your OBD2 Connector
Follow these steps to effectively test your OBD2 connector:
1. Visual Inspection
- Locate the Connector: The OBD2 port is typically found under the driver’s side dashboard, near the steering column.
- Examine the Pins: Check for any bent, broken, corroded, or pushed-in pins within the connector.
2. Physical Check
- Connector Fit: Insert an OBD2 scanner or adapter into the port. It should fit snugly and securely. If it feels loose or doesn’t connect, the connector may be damaged.
3. Using a Test Light or Multimeter (Advanced)
This method requires basic electrical knowledge:
- Test for Power and Ground: With the ignition off, use a test light or multimeter to verify power and ground signals at specific pins within the connector. Refer to your vehicle’s wiring diagram for pin assignments.
“Remember, if you’re uncomfortable working with electrical components, it’s best to consult a qualified mechanic for assistance,” advises John Smith, Senior Automotive Technician at XYZ Auto Repair.
4. Testing with an OBD2 Scanner
- Connect the Scanner: Plug your OBD2 scanner into the connector and turn the ignition to the “on” position (do not start the engine).
- Check for Communication: If the scanner successfully connects, it indicates the connector is likely functioning correctly. If the scanner fails to communicate or displays error messages, there might be a problem with the connector or wiring.
What to Do if You Find a Problem
- Clean the Connector: Use electrical contact cleaner and a small brush to remove corrosion or debris from the pins.
- Repair or Replace: If you identify bent or damaged pins, loose connections, or wiring issues, you may need to repair or replace the connector. Consult a mechanic or refer to your vehicle’s repair manual.
Maintaining Your OBD2 Connector
- Keep it Clean: Regularly inspect and clean the connector to prevent corrosion.
- Secure Connections: Ensure any devices plugged into the port are securely connected.
- Protect from Moisture: Avoid exposing the connector to excessive moisture.
Conclusion
Testing your OBD2 connector is a simple yet vital aspect of car maintenance. By understanding its importance and following these testing procedures, you can ensure accurate diagnostics, prevent unnecessary repairs, and keep your vehicle running smoothly. Remember, a well-maintained OBD2 connector is your key to unlocking the secrets of your car’s health.
FAQs
1. How often should I test my OBD2 connector?
It’s recommended to visually inspect your OBD2 connector at least every oil change or during regular vehicle maintenance. Testing with a scanner can be done whenever you suspect a problem with the connector or are experiencing diagnostic issues.
2. Can I drive with a faulty OBD2 connector?
While a faulty connector won’t directly prevent your car from running, it can hinder accurate diagnostics and potentially mask underlying vehicle problems. It’s crucial to address any connector issues promptly.
3. Can I replace the OBD2 connector myself?
Replacing the connector itself can be complex and requires some electrical knowledge. If you’re comfortable with basic wiring, you can refer to your vehicle’s repair manual. However, it’s generally recommended to consult a qualified mechanic for this repair.
4. Are all OBD2 connectors the same?
While all OBD2 connectors share a standard 16-pin configuration, there might be slight variations in their physical design depending on the car manufacturer and model year.
5. What if my scanner still doesn’t connect after testing the connector?
If you’ve tested the connector and it appears to be in working order, but your scanner still won’t connect, the problem might lie with the scanner itself, the vehicle’s computer, or related wiring. Further diagnostics will be necessary.
Need more help with your OBD2 scanner or connector? Contact our expert team via WhatsApp: +1(641)206-8880, Email: [email protected]. We’re available 24/7 to assist you. For more information on OBD2 scanners, check out our article on how to choose an obd2 scanner. If you’re dealing with a specific OBD2 code, like obd2 code p0325, we have detailed guides to help you troubleshoot.
