Understanding the Toyota OBD2 pin layout is crucial for anyone who wants to diagnose their vehicle’s issues, from professional mechanics to DIY enthusiasts. This guide provides a detailed explanation of the Toyota OBD2 pin layout, its functions, and how you can use it to troubleshoot your car.
Decoding the Toyota OBD2 Port
The OBD2 port, also known as the Diagnostic Link Connector (DLC), is a standardized 16-pin connector found in most Toyota vehicles manufactured after 1996. This port provides access to your vehicle’s onboard computer, allowing you to retrieve diagnostic trouble codes (DTCs), monitor real-time data, and perform various tests. Each pin in the toyota obd2 pinout has a specific function, and understanding these functions is key to using your OBD2 scanner effectively. You can also find useful information about general OBD2 ports at our obd2 port pin out guide.
What Each Pin Does in a Toyota OBD2 Connector
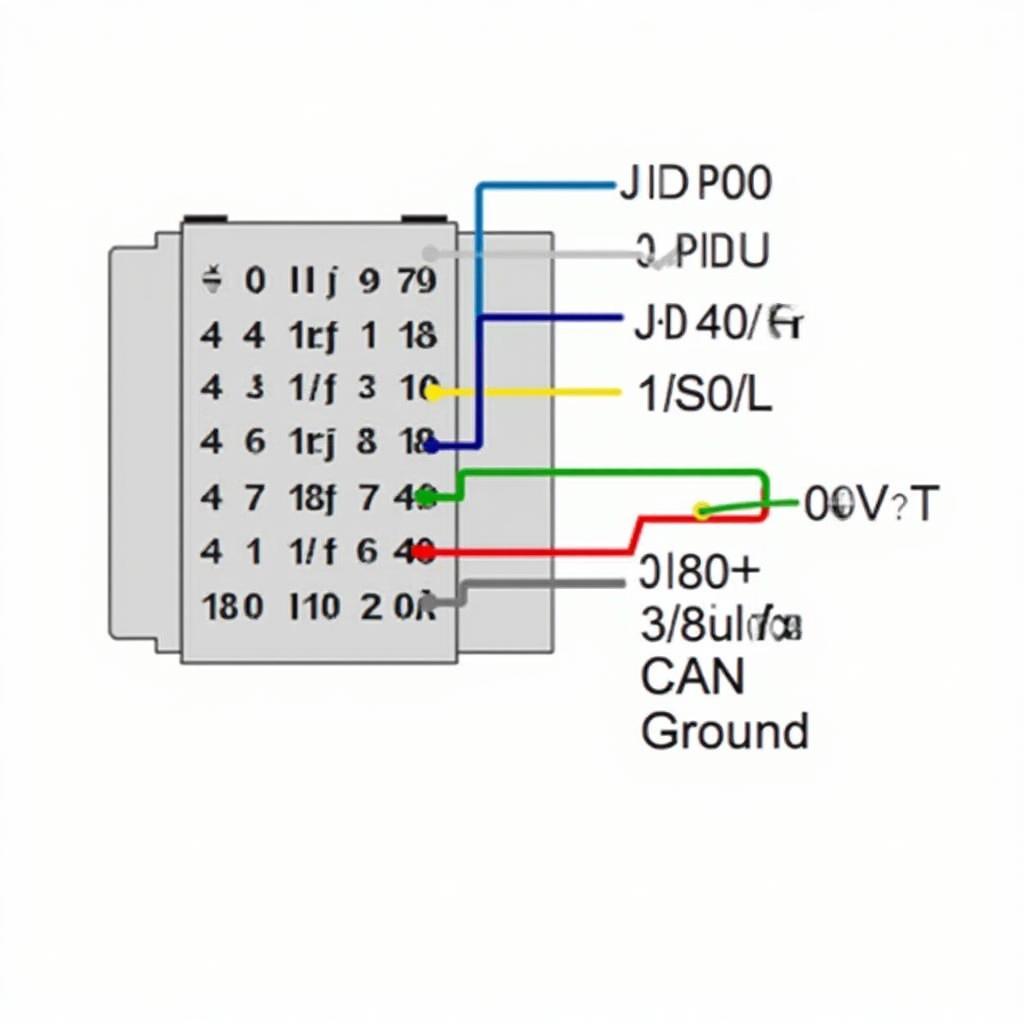 Diagram illustrating the function of each pin in a Toyota OBD2 connector.
While the standard OBD2 pin layout is consistent across most manufacturers, certain pins, particularly those dedicated to manufacturer-specific communication protocols, might have slightly different functionalities depending on the car model. Here’s a general overview of the Toyota toyota obd2 connector:
- Pin 1: Not used in most Toyota models.
- Pin 2: J1850 Bus+ (for some older models).
- Pin 3: Not used in most Toyota models.
- Pin 4: Chassis Ground.
- Pin 5: Signal Ground.
- Pin 6: CAN High (J-2284).
- Pin 7: ISO 9141-2 K-Line (for some older models).
- Pin 8: Not used in most Toyota models.
- Pin 9: Not used in most Toyota models.
- Pin 10: J1850 Bus- (for some older models).
- Pin 11: Not used in most Toyota models.
- Pin 12: Not used in most Toyota models.
- Pin 13: Not used in most Toyota models.
- Pin 14: CAN Low (J-2284).
- Pin 15: ISO 9141-2 L-Line (for some older models).
- Pin 16: Battery Power.
For specific information on your Toyota model, always refer to the owner’s manual. Modern Toyotas primarily use CAN communication (pins 6 and 14).
Locating the OBD2 Port in Your Toyota
Where is the OBD2 port in a Toyota? It’s typically located under the dashboard, near the steering column or within the driver’s side footwell. Sometimes it might be hidden behind a panel.
Knowing the toyota camry 2009 obd2 location or any other model can save you time and frustration. For instance, in the 2009 Camry, you’ll find it under the dashboard to the left of the steering wheel.
Why is Understanding the Toyota OBD2 Pin Layout Important?
Knowing the toyota obd2 pin layout is valuable for several reasons:
- Troubleshooting: Identifying the correct pins helps you connect your scanner correctly and avoid potential damage.
- Advanced Diagnostics: Understanding which pins carry specific data allows for advanced diagnostics and data logging.
- DIY Repairs: With the right knowledge, you can perform some diagnostics and repairs yourself, saving money on mechanic fees.
“Understanding the OBD2 pin layout is like knowing the language your car speaks,” says Robert Thompson, a certified automotive technician with over 20 years of experience. “It opens up a whole new level of communication and allows you to diagnose problems more efficiently.”
Using an OBD2 Scanner with Your Toyota
Once you’ve located the OBD2 port and understand its pin layout, using an OBD2 scanner is relatively straightforward. Simply plug the scanner into the port, turn on the ignition, and follow the scanner’s instructions. You can even leverage the power of your smartphone with our obd2 android app source code.
“Modern OBD2 scanners are incredibly user-friendly,” adds Thompson. “With a little practice, anyone can use them to get valuable insights into their vehicle’s health.”
Conclusion
Understanding the toyota obd2 pin layout empowers you to take control of your vehicle’s diagnostics. Whether you’re a seasoned mechanic or a DIY enthusiast, this knowledge is essential for troubleshooting and maintaining your Toyota.
FAQ
- What is the OBD2 port used for? It’s used for retrieving diagnostic trouble codes (DTCs), monitoring real-time data, and performing various tests.
- Where can I find the OBD2 port in my Toyota? It’s usually located under the dashboard, near the steering column or driver’s side footwell.
- Are all Toyota OBD2 pin layouts the same? While the standard layout is consistent, manufacturer-specific pins might vary slightly between models.
- Do I need special tools to access the OBD2 port? No, the port is easily accessible.
- What is the difference between CAN High and CAN Low? These pins are part of the Controller Area Network (CAN) communication system.
- Why is pin 16 important? It provides battery power to the OBD2 scanner.
- Can I damage my car by using an OBD2 scanner incorrectly? While unlikely, it’s essential to connect the scanner correctly to avoid potential damage.
Other Relevant Topics and Questions
- How to interpret OBD2 codes in Toyota vehicles?
- What are the common OBD2 codes in Toyota?
- How to reset the check engine light in Toyota?
- Differences between OBD1 and OBD2 systems in Toyota.
For further assistance, don’t hesitate to contact us via WhatsApp: +1(641)206-8880, Email: [email protected] or visit us at 789 Elm Street, San Francisco, CA 94102, USA. Our 24/7 customer support team is ready to help.